Different Power Tools Used In Lamp Making

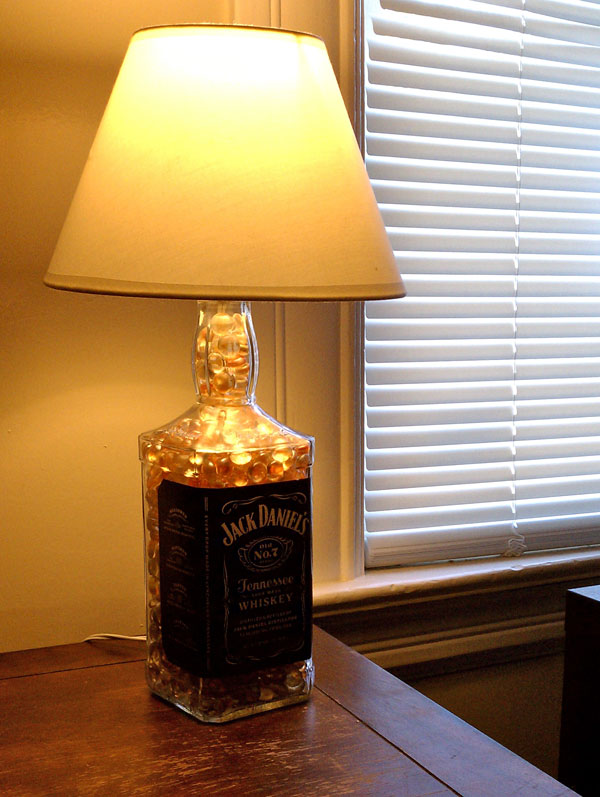
Good lamps add sophistication and class to a room.

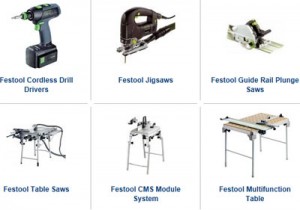
A well designed lamp will also create a certain ambiance through a combination of materials. For you to make a good lamp using recycled materials, good power tools need to be used. There are different power tools used in lamp making. You need to choose what recycled materials to use first because you will definitely use different power tools. The right tool for the right job makes sure the work done is clean and efficient.

different power tools used in lamp making
Festool Power Tools

Making Wooden and Recycled Board Base Lamps

Lamps can be made from a wooden base as well as a wooden holder. Festool power tools have an array of tools that are used to do woodwork. This ranges from general to detailed precision jobs. A good lamp base needs to be strong and beautiful to look at. The holder needs to be well carved for that unique quality. You will need a circular saw to trim the kind of base you want. This is of course assuming your plank of wood was very big. The preciseness will be brought in with a radial arm saw that is more accurate with angles for that clean finish. A power scroll saw can be used to create patterns on the wood piece for a finer finish.

The lathe machine will then provide some rotation for the holder or the arm as you chisel it to a desired design. The arm is then slit into two using a radial arm saw and a thin line chiseled in between to provide space for the cable. These pieces are then glued together. A bulb holder is screwed on top using a power driver and a lamp shade of a preferred color put on it. These two pieces can then be joined using a power driver to drive a screw through the base to the arm. The compressed sanders will give you that smooth finish on the base before joining the two.

The beauty of boards is that they do not need sanding. The cutting and design will still give them a quaint finish.

Making Marble Base Lamps

Lamp bases can also be made of marble. If you have a piece of marble that was displaced, you can use it to create a masterpiece using Festool power tools. A Festool marble cutter will give you the desired shape of the base that you want. The power drill will bore a hole for you to fit the screw and join the arm to the base. The arm can be metallic or wood depending on taste. The cable is wired to the arm and a lampshade of desired color and design put over it. The beauty of these power tools is the ability to cut without cracking and distorting the materials.

Metal bases can also be used but are not as common unless when molded  A fine finish on metal is not possible without paint or other smoothing agents. The lamps can be of any shape and size as long as they are stable. Either way for the daring artists, the Festool power tools will still give you that option.

Three Fall Inspired Bottle Lamps for local Fundraiser

Steven Scott, a local Alexandria Minnesota resident, is to undergo amputation.

Here is an excerpt from our local paper:

“In 1981, three weeks before my 3rd birthday, I rode my Big Wheel down the driveway into the street as a van was passing by. The vehicle’s right passenger side tire struck me. I was struck by an oncoming vehicle and was trapped under it against the pavement with my Big Wheel. As the vehicle came to a stop, it scraped away body tissue on the upper and lower side of my right leg and foot. I was pinned under the vehicle for several minutes until the firefighters arrived. After being rushed to the hospital, the doctors from https://drlarryfranks.com/ found that it was not only my leg and foot that were damaged. I had to have exploratory surgery because I was bleeding internally from my spleen, which was immediately removed.

They also found that my skull had been fractured horizontally from ear to ear, but the skin was still intact. My jaw had been broken in two places and was wired shut for approximately two full months. Because of all my injuries, I had to undergo five to six major surgeries to repair damage that was done to my body.

Since my accident 31 years ago, I am continually dealing with pain. I have sharp jolts of pain from my ankle, soreness in my foot, arthritic toes, decreased movement in my left foot, and pain from what feels like a dislocation in my knee. When I go through the procedure, it will take about six weeks of recovery and then I will be fitted with a temporary prosthesis. This device will include the socket that the stump will fit into and will be reshaped according to muscle size. Overall, it will take two years before I am able to walk naturally.

Local Stars will come together to raise funds for Steven Scott during a fundraiser that will be held for Steven Scott on Sunday, October 28 from 4 to 9 p.m. at Carlos Creek Winery near Alexandria. The event will raise funds to assist Scott, who has no insurance, with medical expenses. Scott is a guitar teacher at Carlson Music in Alexandria.

We gladly donated three of our Fall inspired bottle lamps and hope Steven will have a successful surgery and be able to lead a life without pain from then on.

Raising funds for a worthy cause with Bottle Lamps
Fall Inspired Bottle Lamps

Read the complete article on Steven Scott at the Alexandria Echo Press website.

Autumn Leaf Bottle Night Light

We decided to dress up one of our plain 1 liter recycled liquor bottles for the Fall season. We’ve always wanted to try glass frosting and this seemed like the perfect time to give it a whirl.

The frost reflects the cooler temperatures of the season with a combination of fall leaves and orange LED lights. Right now is a great time to pick up seasonal colored LED lights in orange and purple. Nick also grabbed some Fall leaf window clings and attached them to the bottle after drilling the hole in the back.

With the decals in place he stepped outside on our deck and evenly applied the Krylon Glass Frosting all around the bottle. After two coats we felt confident the bottle was adequately covered. We only had to wait about 20 minutes for the glass to dry and then simply peeled the window clings off the bottle to be used again some other time. To give the light string a little bit more volume we attached strips of orange and gold ribbons in between the lights. Now it was just a matter of inserting the light string through the back of the bottle.

In the meantime Silke grabbed a wine cork and began hot gluing the little pumpkin to the top of the cork and attaching layers of ribbons around it. She also added some Fall leaves and a little stick adornment to the cork.

Here is a picture of our finished Autumn Leaf Bottle Night Light:

Autumn Leaf Night Light
Autumn themed bottle accent or night light

We are going to experiment with other plain recycled glass bottles we have. We like the frosting effect, especially for the upcoming Holiday season. Nick is already looking for snow flake window clings. :)

Do you have a seasonal Bottle Craft Idea you would like to share?
Please leave us a comment below.

Absolut Vodka and Jack Daniel’s Lighted Bottles by Julie

Jack Daniels Bottle Lamp

Julie emailed us a while ago about how to drill a square bottle. We will write an article and post her question and give tips on what to look for when drilling square bottles under our DIY Projects category.

In the meantime, Julie succeeded in drilling a square Jack Daniel’s bottle as well as an awesome looking Absolute bottle. Here is what Julie said in her email to us: “I finally suceeded drilling my Jack Bottle. Here are a couple pictures. I really like the ABSOLUT Bottle.”.

Lighted Jack Daniels Bottle by Julie
Lighted Absolut Bottle by Julie

Julie, thank you for sending in pictures of your lighted bottles.

We are delighted to see that you stuck with it and were able to drill a square bottle without breaking it :). We think both of your bottles filled with crystal gems turned out fantastic. Well done!


Do you have a DIY project you would like to show off?
Send an email to contact@jagerfoods.com with your picture(s), your name and a description or any tips you would like to share with us and our readers. If you have a blog you can also include the web address, we will link back to you.

Set of 4 Lighted Bottles by Mary

We received this email along with a picture from Mary, she gracefully allowed us to share it with you. :)

I have completed my first set of 4 bottles and have attached a photo of them
(with their lights off). My husband drilled the holes in the bottles,
thanks to your excellent “How To” video. We made these bottles for our 4
grandchildren as momentos of their visit with us at the shore…you will
note the theme of fish, shells or waves depending on the particular aspect
of the ocean that was appealing to each child. I put glass marbles in the
bottom of the bottle, some shells and sea glass on top and decorated the
yarn, rafia and ribbon tied on the bottle with glass and wooden beads. We
are anxious to see how they like them this Christmas, especially when the
lights are turned on. Thank you again for sharing your expertise on the
internet.

Mary

set of 4 lighted bottles
Four Lighted Bottles by Mary

Mary, thank you so much for sending in your picture. We think your bottles are beautiful, each one being a little bit different and unique. Your grand children and their parents are sure to love and treasure them.


Do you have a DIY project you would like to show off?
Send an email to contact@jagerfoods.com with your picture(s), your name and a description or any tips you would like to share with us and our readers. If you have a blog you can also include the web address, we will link back to you.

Tips for drilling a Glass Bottle

We receive emails with questions regarding the glass drilling process, where to find diamond tipped bits, light strings, bottle fillers and various other questions on a regular basis.

Here is a great reader email I would like to share with you regarding drilling holes in a glass bottle. Thank you Rinna Fe for sending in your question.

“Hi Nick and Silke. Thanks for this, I am so engrossed in making at least 1 bottle lamp.
However, some 4 good wine bottles are now gathered in a bin for future applications–
like maybe a porch fence top (to avoid trespassers).

Sad to say, I am very unsuccessful in this new endeavor. Should I give up after breaking 4? Best regards, RINNA Fe”

How to drill a square bottle
Tips for drilling a glass bottle


Tips for drilling a glass bottle
A plastic grommet covers the drilled glass edge

Nick’s reply:

Rinna Fe, Wait! Don’t give up. Before you throw in the towel I have a couple of suggestions and points I’d like to share with you.

First off: Pressure. How much force are you using when you’re drilling? You don’t want to go to hard at it. One way that might help you with this is to drill for a small amount of time and walk away from it for a little bit. Take your time. Don’t rush it or feel you need to do it all in one setting.

Second: Using multiple drill bits really helps. Switch back and forth between your pilot hole drill bit (which is the smallest one you have), and the next size up. By switching back and forth you can displace the heat that can build up by using just one constantly. You can get this set of 4 drill bits for only $14.70 & FREE Shipping on Amazon.

bits for drilling glass bottles

Buy Here

Third: Investing in a wax ring might help you as well. Once you’ve made the mark on the bottle using the punch, you can place a wax ring around the area and put water in the ring. If you do this before drilling your hole. You will be able to keep the heat on your drill bit low and also monitor the amount of drilling you’re doing. The water should turn a milky color. If it isn’t and the water is rising in temperature then your drill bit isn’t even drilling and you may break the bottle.

I broke a few bottles myself and always felt I needed to go back and try it again.

So I know how you feel about wanting it work out for you. Keep a slow steady drill bit speed and minimal pressure and you should do just fine.

Good luck.

Are you still feeling apprehensive about drilling a coveted glass bottle?

Get more glass drilling tips and learn about Nick’s tools & techniques.

Do you have a question about drilling glass bottles, finding bottle project resources or do you simply want to say ‘hi’?

Click here to send us an email or leave a comment below.

Review of Diamond Drill Bit Set

Review of drill bit set

A diamond drill bit set that you will use time and again.

Nick and I made this short video to feature the 10 piece diamond drill bit set we use to drill most of our recycled bottles.

Nick uses one of these drill bits when drilling holes in bottles to make our bottle lamps, lighted wine and liquor bottles, candle bottle holders or any other recycled DIY glass bottle project. He’s had this set of bits for about a year now and used every one of them by now. The bits come in a nice, sturdy wooden box for storage. No clutter on the work bench and you’ll never have to hunt for them, as long as you put them back where they belong :).

Depending on what size hole we want to drill, this set of diamond tipped bits comes in very handy. Having a variety of sizes available to us saves a lot of time. The 10 piece Diamond Hole Saw Set can be used on a drill press as well as a hand held drill.

Product Features:
10 Pc Diamond Hole Saw Set
Sizes: 1/4″, 3/8″, 1/2″, 3/4″ and 1″ on 1/4″ Shank.
Sizes: 1.1/4″,1.3/8″, 1.1/2″, 2″, 2.3/8″ on a 3/8″ Shank.
Comes in a Wooden Box.
Made In China

Order your own set of Diamond Drill Bits

Visit our Resources page for other tools and supplies you might need for your DIY Bottle Projects.

Do you use a specific drill bit or other DIY tools you would like to share with us? Please leave a comment below.

Jack Daniels Bottle Lamp by Sutton

DIY Show Off - Recycled Bottle Project

Thank you Sutton for sending us a picture of your awesome Jack Daniels bottle lamp. It turned out excellent!

We asked Sutton if he had any comments about his bottle lamp making experience.

Here is what he said: “This was a first DIY project for me. I made the mistake of drilling too quickly and broke the first bottle. But being the jack daniels enthusiast that I am, another bottle was empty soon enough and I took my time the second time. Gave it to my roomate as a birthday present, we both enjoy it. Im a college student living in a frat house so it seemed more than appropriate! Thanks for the inspiration.”

Sutton

Santa Clara, California

DIY Show Off - Recycled Bottle Project
Sutton’s Jack Daniels Bottle Lamp

Do you have a DIY project you would like to show off?

Send an email to contact@jagerfoods.com with your picture(s), your name and a description or any tips you would like to share with us and our readers. If you have a blog you can also include the web address, we will link back to you.

Recycled Glass Bottle Plant Holders – Part II

Liquor Bottle Strawberry Plant Holder

We completed one of our Glass Bottle Plant Holders about three weeks ago and the other ones a few days later.

So far, as of the end of May, the cherry tomato plant is looking the best. Here are some pictures I took this morning.

From left to right we have a tomato plant in a Champagne bottle, a strawberry plant in a Black Velvet liquor bottle and another strawberry plant in a Black Oak wine bottle.

Recycled bottle plant holder for tomato plant

Champagne Plant Holder

Liquor Bottle Strawberry Plant Holder

Liquor Bottle Plant Holder

Wine Bottle Strawberry Plant Holder

Wine Bottle Plant Holder

Our next Bottle Plant Holder will hold a Vica Vine. I would think that the plant would take right off, being a vine and all. :)

Recycled Glass Bottle Plant Holders make unique gifts. Simply pick the persons favorite wine, liquor or any nondescript glass bottle, drill a hole in the bottom, add dirt and a plant and attach a wire or hemp rope to the bottle neck.

Do you have any suggestions on which other plants we should try out

in our Bottle Plant Holders? Please leave us a comment below.