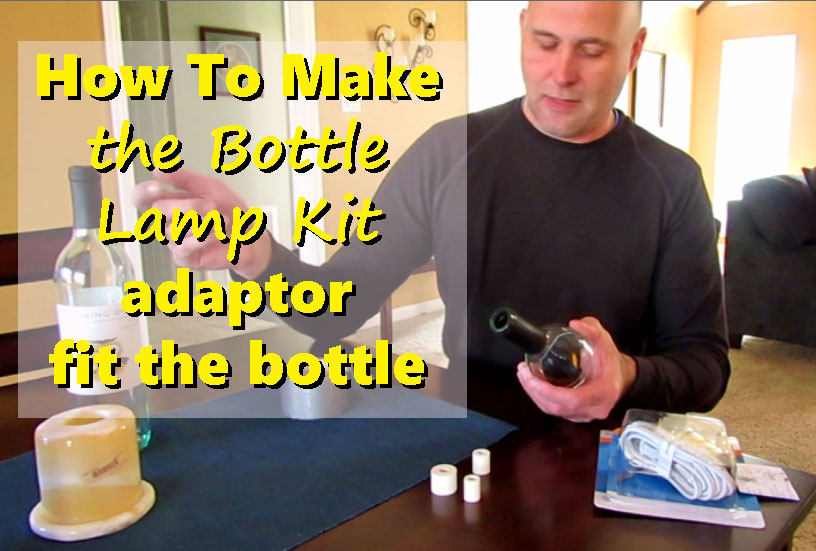
The bottle lamp kits that come complete with all your accessories might need to be modified.
One of the most recurring questions that we get for the bottle lamp kits are the ones concerning the rubber adapters that should fit the neck of the bottle. Most kits come with three varying sized adapters that should cover all the different bottle necks sizes quite nicely. Unfortunately, they all seem to fall short or are way too big.
The fix is really simple and only requires a small amount of everyone’s favorite go to fix it, ‘Duct Tape‘. Yep, that’s right, that universal essential tool, all-purpose duct tape that can be found in everyone’s tool box. Versatile and never out of fashion a couple little strips of the duct tape will have you up and running in no time.
By ripping off a strip of duct tape the width of the adapter and adding a few layers to it, you will then have a more snug fit for your bottle’s neck. Having the duct tape the width of the adapter will also make it easier to conceal the adapter. You really don’t want the duct tape to show so this makes it easier to hide.
The corresponding video on how to make the bottle lamp kit adapter will give you a better visual idea of what to do.
Hopefully this will make it easier for you to complete your bottle lamp project.
Leave me a comment if you have any questions!
Do you have a DIY project you would like to show off?
Submit your entry – include your picture(s), your name and a description and or any tips you would like to share with us and our readers. If you have a blog you can also include the web address and we will link back to you.
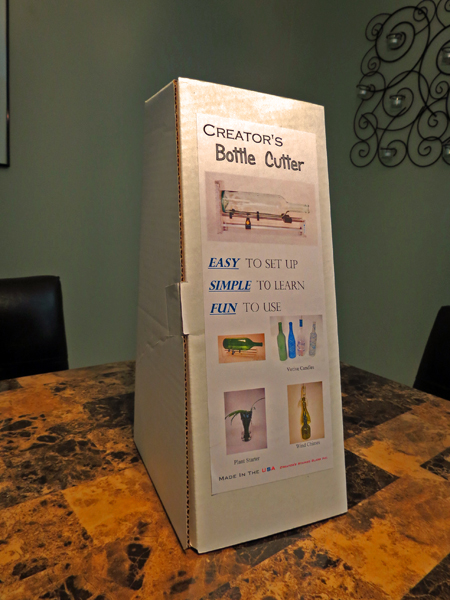
Can one tool really help you accomplish so many different crafts?
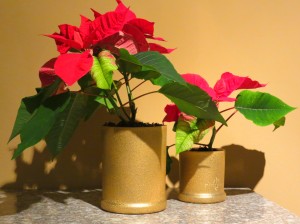
With the Creator’s Bottle Cutter tool, you will be able to do many of the craft projects that you’ve seen at local craft fairs and social media sites. From plant holders to pendant lamps, you will discover that these projects can be a fun and inexpensive way to up-cycle old glass bottles.
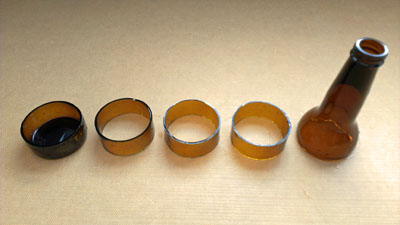
One of the projects that I had seen numerous times was the glass rings that were used to make a mobile. The rings were attached to a piece of drift wood with fishing line and suspended with the help of the bottle’s neck that had been cut off from the bottle. It looked like a fun project but as I soon discovered, cutting all the rings the same was no easy feat.
My first attempts were with a second rate bottle cutters that claimed to be easy to use. This was just a sales gimmick that lured unsuspecting customers into purchasing a low end product. The whole idea was shelved all because I didn’t have the right tool! Luckily I found the perfect tool and here it is:
A better bottle cutter. It would have been easy to leave that project where I had left it (in the dumpster), but it didn’t seem right to let others fall into the same trap that I was in. It was then that I began to document my frustrations through my blog pages and video channel. It was not my intent to slam their product but to simply ask the question: What was I doing wrong? Within a very short period of time I began to get a varying degree of responses. It was split evenly between people who raved about the product and those that commiserated with my level of frustration. Finally someone turned me toward a better bottle cutter simply titled: best bottle cutter.
Now I had a bottle cutter that was sturdy and built with a level of detail that would allow me to cut glass rings consistently. With the Creator’s Bottle Cutter in hand I set out to make that glass ring mobile that I had wanted to put together for so long.
Bottle dissection using the Creator’s Bottle Cutter
This project was just the beginning of a series of glass crafts that I would set out to do. With so many other ideas to begin trying it became overwhelming to see all the possibilities that this tool could offer. Here are just some of the many projects that I have worked on.
Creators Bottle Cutter with flower vase holder
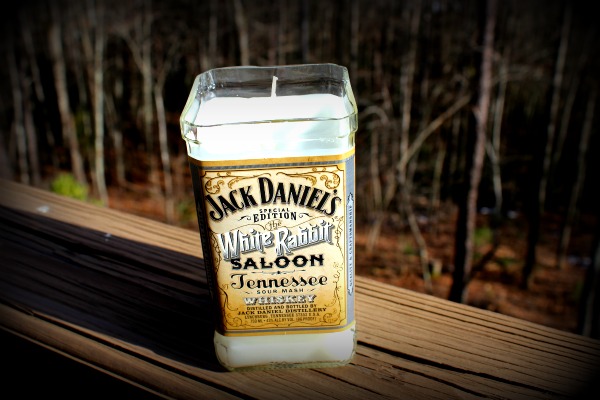
These are just a few of the many projects that the Creator’s Bottle Cutter can handle. The Jack Daniel’s candle illustrates the cutter’s versatility at working with square bottles. I have had this bottle cutter for several years now and I have been happy with it the entire time.
My score lines have always been consistent and it has offered me a seamless transition for all of the different glass bottle projects that I have attempted.
The Bottle Lamp Making Video That Was Better Late Than Never!
Have you ever wondered why we put off doing something that would have only made life easier? That’s what I wondered about for a long time in regards to our bottle lamp video.
Watch Our How To Make A Bottle Lamp Video:
It was late one evening (3:00 a.m. to be exact), that an epiphany of sorts came to me. The Bottle Lamp website had been up and running for over five years now and I was always under the assumption that we had covered every aspect of the bottle lamp making process. From tools of the trade to wiring techniques. But one of the most obvious things that was missing was a video that showcased the whole process.
This seemed like more than just an over site on my part. This was a huge error that needed immediate attention. On the home page we always show cased different videos. From drilling and cutting bottles to reviews of different tools that help simplify the process. If someone was visiting for the first time they would see this prominently displayed almost at the top of the page. Now if you did a search for ‘How To Make A Bottle Lamp‘, and the Bottle Lamp website came up at the top of the list in the search engine query you’re more than likely going to go there expecting to find the information that you need to do exactly that. Up until now that hadn’t really been the case.
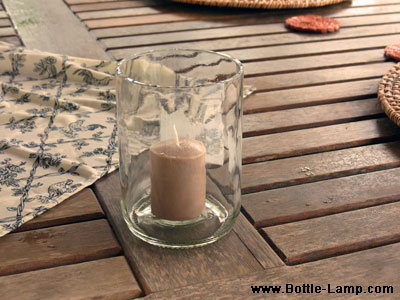
The Bottle Lamp We Made During The Video
Righting the wrong. This was huge. I was itching to get going and was really trying to pitch this idea to Silke. We needed to make this video. Like yesterday. She wasn’t as ‘gung ho‘ about making another video as I was and it was starting to feel like I was selling ice cubes to Eskimos.
This was my big sell: “This is possibly the most important video that we ever made, in the history of us making videos.” This heavily dramatized statement caught her attention and she gave me a look like she was waiting for the punch line. She saw I was serious but had to break out laughing. It was over the top and I really don’t think she felt as passionately about it as I did but that really didn’t matter. She was on board and that was what counted.
The video making process. One of the main reasons I really needed Silke’s approval for this was that she’s the one who has been instrumental in putting almost all of the videos together. I’ve put a few together myself and they turned out o.k. but this one had to have everything going for it. I always have trusted her instinct on how the videos look and feel so having her on board was huge. The header image and all the editing was crucial. I’m not the best person to have acting these out but with her editing I somehow come off looking coherent and actually semi intelligent. We needed this to be all those things and so much more.
Lights, camera, action. We are currently care taking in Hawaii and so all of my tools are back home in a storage shed. This actually worked to our advantage. One of the things that I wanted to show in the video was that with a few simple tools, the viewer could make a bottle lamp themselves. If we had shot this at home I would have simply pulled out my drill press and had the hole drilled in seconds.
Obviously not everyone has a drill press in their house. A corded or cordless drill is more likely. Being able to keep the process simple allows a much larger demographic of people to be able to relate to your concept. With all the tools and equipment lined up we were ready to start rolling.
It took a couple takes and their was some scenes that had to be re-shot but we eventually got it done. The longest part of all this is the video editing. We had recently upgraded our video editing software to Corel VideoStudio Pro X8. Prior to this we had run a much older version so we knew the lay of the land when it came to utilizing the tools that came with it. Never the less, there was a little bit of a learning curve that came with putting it all together.
There was a lot more that we were able to do with the text manipulation. One of the things that the video had was a recurring list that showcased the steps that were needed to complete the process. The list would re-appear with the addition of the next step. I really like how this turned out because it drove home what we were trying to show in the video.
Let it roll! Silke was patient enough to get all the editing done in one setting. We would look at how things had come along so far and then continue on. This back and forth process may have taken a little longer but we were able to make sure that it had a good flow to it and didn’t drag out too long in certain places. The bottle lamp drilling process can be tedious and I really didn’t want to put our viewers to sleep watching this. With a couple of cuts and splices we were able to shorten this down considerably and make it more viewer friendly.
Good results? When you work hard to put something together you are always eager to get feed back about it. This little bottle lamp video was no exception. In 24 hours we had quite a few views, no comments and a thumbs down vote. I wasn’t too discouraged. There are a lot of haters out there and the thumbs down could be attributed to a random troll’s feedback. The views on the other hand were impressive. The numbers continued to grow but no real actual response. Time will tell.
The final verdict. Two weeks after the release of the ‘How To Make A Bottle Lamp DIY’ video we have over 33,000 views. 396 thumbs up and the lonely one thumb down. As impressive as all that is, we still really have no viable real feedback on the video itself. No comments.
All in all I’m happy with the way that the new video turned out and as they say ‘better late then never’.
Here is a Top 10 list of some of the most useful bottle crafting videos that we have seen.
Whether it’s an instructional DIY clip or a new tool that helps you with your crafting, the following videos offer great advice for anyone who has ever thought of recycling old glass bottles. The videos were picked by tools relevant to the trade and the number of views on YouTube. Click on any image to watch the video…
Number 10: How to make a Jack Daniels Bottle Lamp
Number 9: Saber Tooth Diamond Pads Demo
Number 8: How to Splice Wires for Bottle Lights
Number 7: The Best Way to Cut Glass Bottle
Number 6: How to Frost a Lighted Bottle
Number 5: Bottle Bit How To – Sanding the Bottle
Number 4: Creator’s Bottle Cutter: Square Bottle Cutting
Number 3: How To Cut Glass Rings with the Creators Bottle Cutter
Number 2: Kinkajou Bottle Cutter
Number 1: How to make Bottle Lights
After watching the videos be sure to check out our ‘Bottle Crafting Resources‘ page. It’s loaded with all of the equipment that you’ll need to help you get the job done!
Which one of the 10 Bottle Craft Videos did you enjoy the most? Leave me a comment below.
Whether you are working at home or on the job, having the right tools can make all the difference.
It didn’t take long for me to realize just how much I had relied on my bench drill until it was gone. Drilling glass bottles with an electric hand drill and regular glass drilling bits is do-able but it doesn’t produce the nice clean edges. You have to take this with a grain of salt, because when I’m using the drill press, I’m also using my diamond tipped drill bits. Something you can’t do (yes, I tried), with an electric or cordless drill.
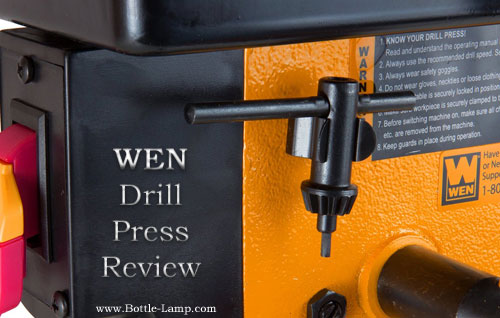
After careful consideration of both price and size, I decided to go with the WEN 4208 8-Inch 5 Speed Drill Press .
Price-wise it is mid range and it fell in line with a lot of what the other bench drill presses had to offer; varying speeds, adjustable table, and around 1/3 HP. The 8 inch is on the low end in terms of size, WEN also offers a 10, 12 and 15 inch machine, but having anything bigger in our house seemed absurd.
From a hobby perspective this little guy offers plenty of power in a compact unit (it weighs only 33.5 pounds) and I like that it has a place to attach the chuck right on the side of the machine.
Some More Product Details:
Includes: The Drill, 1/2″ Keyed Chuck, Chuck Key and Tools for Assembly
620-3100 RPM Range (5 Speeds: 620, 1100, 1720, 2340, 3100) to accommodate various materials and thicknesses
Spindle Travel of 2″ with easy to read, locking linear depth stop for accurate and repeatable drilling operations
Durable 1/3hp induction motor develops ample torque and power
6-1/2 x 6-1/2″ cast iron worktable is height adjustable and bevels up to 45 Degree left & right
Some careful price comparisons brought me to Amazon where the WEN drill press retails for only $79.99. This will get you free shipping even without Prime membership and it took just five days (including the weekend) until it arrived.
Right out of the box it took me around ten minutes to assemble it completely (see video for unpacking and set up).
The minute you turn on this drill press, you will notice something missing right away. The noise.
I was expecting it to let everyone in the house and the neighbors know that it was running, instead it quietly hummed to life and it was ready to go to work. It had been a long time since I had a chance to use my diamond tipped drill bits, much less drill a glass bottle. I got all my gear together and prepared my first job.
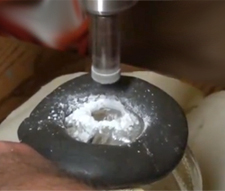
Drilling bottles involves having some plumbers putty that you roll into a donut shape. Once you’ve found the area where you want to drill you circle it with the putty. This will allow you to retain a small amount of water over the area where you are drilling, it will also minimize glass dust and reduce heat from friction.
Working with the WEN drill press was effortless and it was nice to be able to once again create the nice clean edges that I had come to expect from the diamond tipped drill bits.
It is my intent to add some materials to the drill press work table that will accommodate the bottles. A little buffer to rest the glass on will also be added. Having the drill come right out of the box and be ready to go with minimum effort and time was a huge plus.
The only thing that I can even bring to this discussion as a point of complaint would be for the fact that I’m left handed. In a right hand dominated world I’m sorely outnumbered and as my brother always says; “You will learn to adapt.”
This quiet, compact, powerful machine is everything that I had hoped it would be. With the versatile speeds and angles I believe that I will be able to accomplish all of my hobby projects and more. Easy on the pocket book, it’s practically a steal, and it drills through glass like butter. :)
Read more about the WEN Drill Press on Amazon, including a ton of customer reviews!
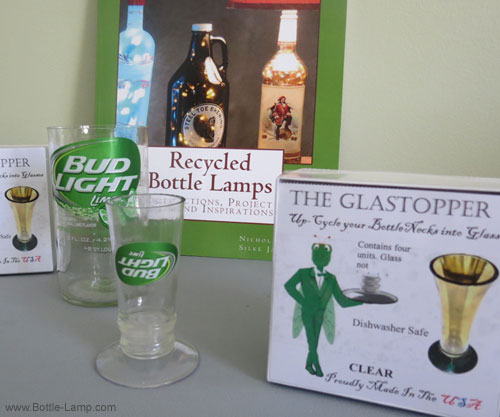
Ray, from Creator’s Stained Glass Inc., has sent us his latest creation ‘The GlasTopper’.
I’ve been cutting different types of glass bottles for awhile now and it always felt a bit off to throw away any of it. Besides making wind chimes I never knew what to do with the cut off bottle necks.
Now you and I can use our beer bottle necks and turn them into the perfect little shot glasses. Or use a larger bottle and turn the neck into a unique drinking glass.
The GlasTopper is dish washer safe and comes in clear and black. Up-cycle your Bottle Necks into Glasses!
Glastopper Instructions:
Wine bottle and beer bottle openings vary. Wine bottle’s usually have a smaller opening than a beer bottle. To insert the Glastopper into a small opening, you should first get it wet with some water and then twist it into the opening.
On a larger opening, you may push in the GlasTopper dry. However, you may still get it wet to push it in. Allow 10 minutes for the rubber to re-expand and that will keep the GlasTopper in place.
The Glastopper
With one empty bottle you can make; a drinking glass and this neat little shot glass with the remaining neck of the bottle. Nothing goes to waste and the whole bottle gets up-cycled!
This is a great gift idea for anyone on your gift list, not just the person who is into bottle cutting or who wants to do craft work as a hobby.
Product review – The little stoppers are easy to use and once they are in place they fit nice and snug so you won’t have to worry about them coming apart while your using them.
Easy to clean and stylishly designed they can be the perfect addition to your next party or get together. The rubber stoppers keep any liquid from leaking and with the sturdy base you don’t have to worry about spilling any of your favorite liquor.
If you are interested in purchasing The GlasTopper, you can find them on Amazon. (Available in clear and black.)
These unique and fun bottle neck stems areselling for only $17.99. You get four bottle stoppers in each box.
The Creator’s products are Made in the U.S.A.
Please share your thoughts in the comment section below.
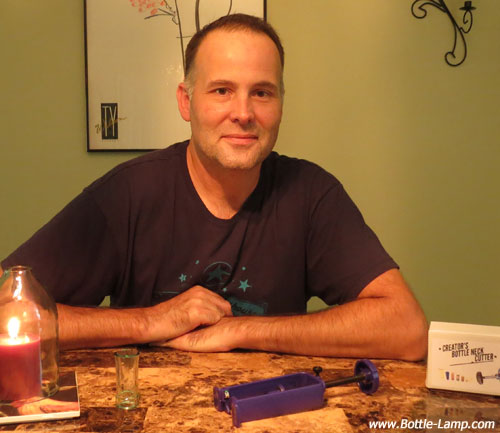
Having the right tool for the job is essential to whatever task you have at hand. Imagine having the right tool show up in your mail box!
When the Creator’s Bottle Neck Cutter (CBNC) arrived I was more than excited to test it right away. I’ve seen the ‘Hurricane Lamps’ on the Pinterest boards for awhile now and it always came down to asking ‘How did they do that?’
Finding the right device to take the neck off of glass bottles was what Ray from Creator’s Stained Glass Inc. pondered before creating this new device.
Straightforward, easy to use, you’ll be cutting off bottle necks in no time. A tightening screw set on the side allows you to adjust the height that you want and then lock that position in. This bottle cutter will come in handy if you are doing a continuous succession of similar bottles.
Holding the CBNC with one hand allows you to rotate the bottle around with your other hand. Keeping a constant downward pressure while slowly rotating the bottle. I could visually see my score line while cutting. Note: Being able to see how far along you have made your score prevents you from over scoring.
Finishing – Taking a light wet sand paper to the edges is highly recommended. Little shards are usually left behind and you want your edges to be smooth, not only for the end user, but for the look of your project as well. The separation on these score lines was so precise that you really don’t need to spend a lot of time sanding your edges.
Creator’s Bottle Neck Cutter Review Summary
I literally took this tool out of the box and shot the complimentary video that coincides with this post. It was that easy! By using the hot/cold method to separate my score line the whole process took less than five minutes. This time included heating the water, and the sanding as well.
This Bottle Neck Cutter is made of thick, impact resistant Lexan plastic and a high quality carbide cutting head. It is a must-have for anyone who does craft work that involves glass cutting. You will be pleasantly surprised to find a clean and consistent separation for all your glass scoring and separating, even when working with tapered bottles.
When it comes to my bottle projects I’ve come to the conclusion that some things go together quite easily.
Others don’t even stand a fighting chance. Yes, there was a little bit of a learning curve to drilling the bottles. I broke a few before I was able to make some adjustments to what I was doing to get it down to a science. I wish the same could be said for my attempts at cutting bottles. Silke and I had seen a video that showed how to do the whole things using some string and fingernail polish. Our attempt resulted in a complete mess and a jagged looking, broken bottle.
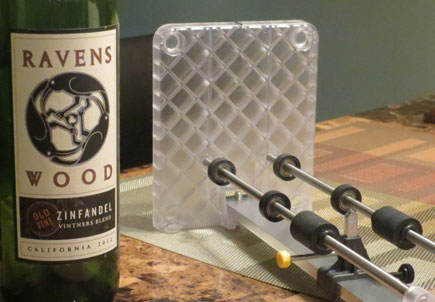
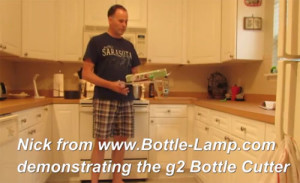
Enter the G2 bottle cutter. It seemed almost too good to be true. The string, aside from being a mess, was inconsistent with the type of bottle cutting that I wanted to do. My goal was to cut a series of similar bottles so I could make a chandelier. In order to achieve this, I would need all the bottles to be cut consistently to the same length. The G2 bottle cutter is supposed to do just that. With an adjustable arm that allows the user to set the depth and lock it in, I would be able to cut enough bottles and have them all turn out the same.
To good to be true? What looked good in theory has turned out to be anything but good in practice. I’ve littered the garbage with bottles that just can’t seem to measure up to the desired effect. The bottles either break or cut unevenly and leave big jagged edges.
This whole adventure has left me wondering what I’m doing wrong. I’ve watched several videos now, all using the same device I bought on-line, all making successful cuts. With so many positives uploaded on YouTube, I decided to throw in a negative. My intent is to not to down grade this product but to have someone simply explain to me what I’m doing wrong.
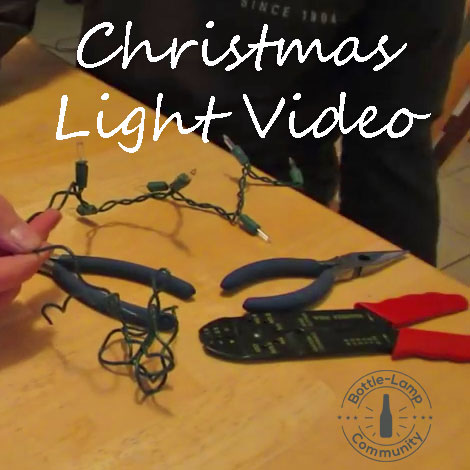
In this short how-to video, it comes in at just under four minutes, Nick demonstrates how to remove the end plug from a string of regular Christmas lights.
We received an email from Joe the other day asking us if there is a way to remove the female end from a string of lights and still keep it operational. Nick has used light strings with the end plugs removed in several of our Bottle Lamp Projects and we haven’t had issues with any of them.
The tools you will need for this project:
Wire Cutter
Wire Stripper
Small Electrical Cap or Electrical Tape
Nick shows you how and where to cut the wires, what to do with the ground wire, how to cap the wires and more. You will be able to utilize the string of lights without the female end and you will be able to insert them into your recycled bottle without any trouble.
To watch all of our videos browse our YouTube channel here: www.youtube.com
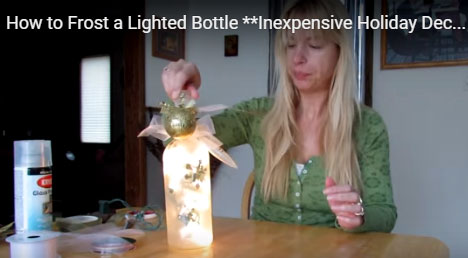
In this ‘How To’ video we show you how to frost a glass bottle with Holiday cut outs.
Step by step video on how to frost and decorate lighted bottles with Christmas decorations. Of course, you can also decorate your frosted bottle with a Hanukkah, Easter, Halloween or any other holiday theme. A uniquely shaped glass bottle with a string of lights and frosting doesn’t really need any extra decoration at all.
Silke shows you how easy it is to use spray glass frosting to create unique and inexpensive Holiday bottle lamps you will be proud to display in your home or give away as a present.
Step 1: Find a recycled glass bottle and drill a hole in the back – visit our Glass Bottle Project Videos page for glass drilling instructions or find our video ‘How to make bottle lights’ in our YouTube feed.
Step 2: Clean the bottle with soap and hot water, dry completely and attach themed Holiday stickers, cutouts or sticky gel stickers. For Christmas decorations you can use stars, snowflakes, Santa Clauses or other Holiday themed stickers. Easter eggs, baskets or bunny stickers for Easter, and so on.
Step 3: Find a well ventilated area and spray the bottle slowly and evenly with the glass frosting spray. Be careful of runs! Let dry completely. Add 3 or more coats until you receive the desired frosting effect.
Step 4: Once the glass frosting is dry, remove the stickers and insert the sting of lights through the hole in the back of the bottle.
Step 5: Decorate the bottle neck. Let your imagination run wild! You can use ribbons, raffia, Christmas ornaments, sea shells, Easter eggs, Halloween decorations, or whatever else you can find around your home.
Frosting a recycled glass bottle to showcase your child’s First Christmas ornament or family heirloom is unique and inexpensive.
Don’t let your favorite ornaments get lost in the Christmas tree ever again! Instead display them on their own recycled glass bottle.
This inexpensive Holiday decor item doesn’t cost you more than $10 at the most. Visit our Resources page to find all the necessary tools and supplies to complete this inexpensive craft project.
We have lots of other Glass Bottle Project Videos for you to look at. Get inspired to make your own bottle crafts and start a new hobby that will offer you lots of fun, entertainment and satisfaction.
Leave us a comment below to let us know how you like our DIY video or if you have any bottle craft questions.