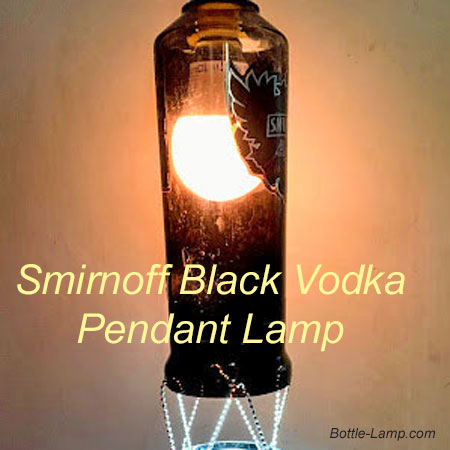
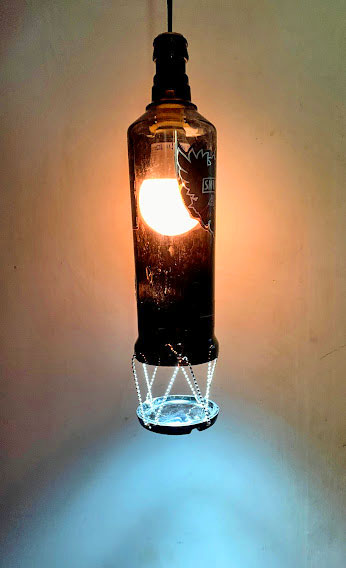
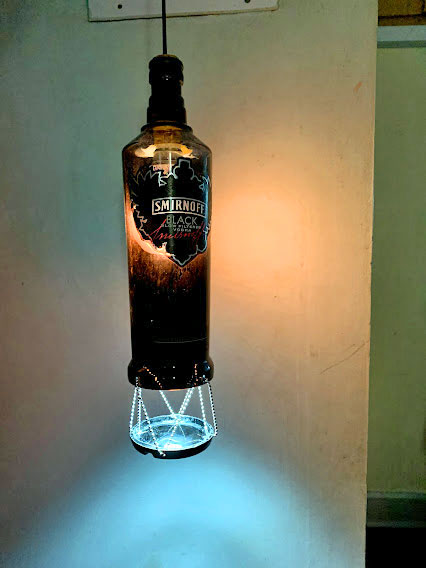
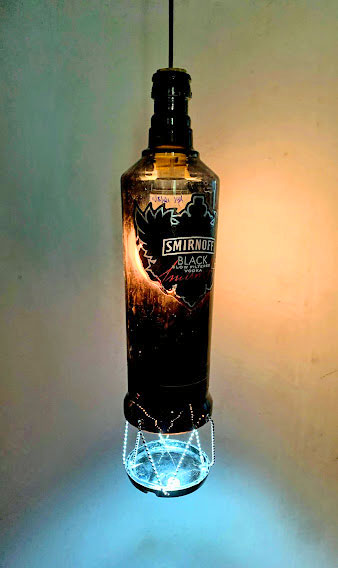
It is always a nice surprise to hear from our readers and receive DIY Projects to share. Our good friend from India, Vijay, has taken on a new bottle crafting project that is a guaranteed conversation piece. Check out how he turned an empty Black Smirnoff Vodka bottle into a very unique pendant lamp using imagination and a silver necklace chain.
Dear Mr.Nick
After a very long time I am writing to you! Guess you are keeping fine. Whenever I think of bottle cutting , making bottle lamp I remember you everytime. I value guidance and encouragement always. Today I completed this bottle lamp and will be too happy to share the picture with you. In my opinion this is the best bottle lamp I have done so far !! But for your encouragement, this work would not have been possible.
Thank you once again.
Regards, Vijayram
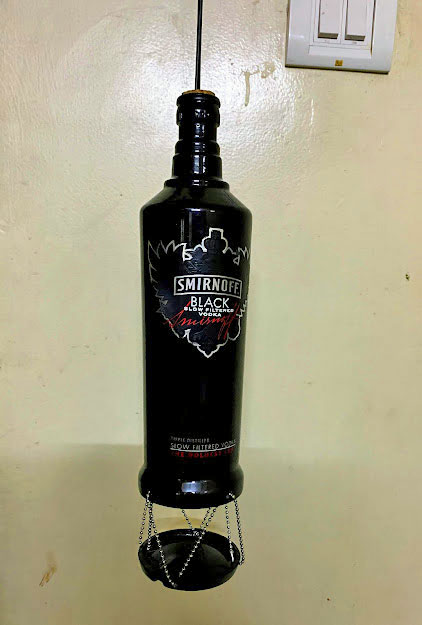
Here are the photos that accompanied the above e-mail:
Smirnoff Bottle Pendant Lamp
We would like to thank Vijayaram for sharing his bottle craft projects with us.
Vijay’s other projects include: A Pulley Pendant Light, Black Dog, Jagermeister and Maker’s Mark Bottle Lamps. He also contributed a helpful tip for ‘Saving Ice And Cold Water During Your Glass Separation Process’. Be sure to check out his other projects below in the ‘Related’ articles section as well.
Please leave a comment below to let him know what you think.
Do you have a DIY project you would like to show off?
Send us an email contact@jagerfoods.com with your picture(s), your name and a description and/or any tips you would like to share with us and our readers. If you have a blog you can also include the web address and we will link back to you.
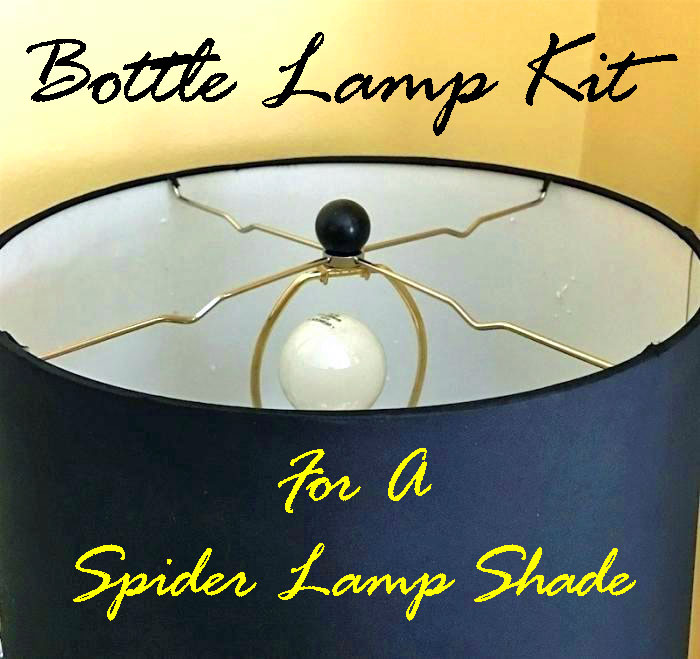
If your looking for a bottle lamp kit that will allow you to use your Spider lamp shade, then look no further.
We got a great question last week and wanted to share it with our readers.
“I have a Spider lamp shade that I want to incorporate into my bottle lamp project. All the bottle lamp kits that I’ve seen so far only work with the Slip fitter lamp shades. Can you recommend a bottle lamp kit that will help make this dream project a reality?
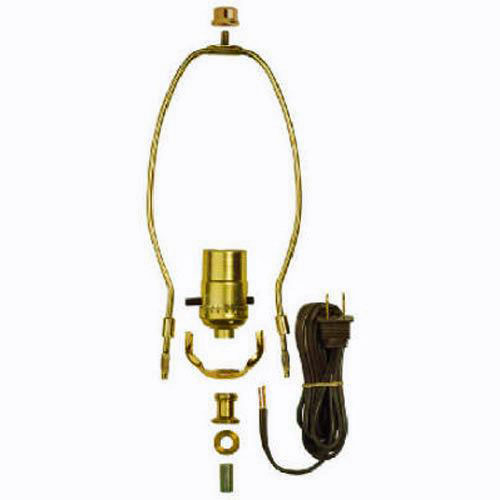
One of the first things that you will notice about this particular lamp kit is that the little rubber stoppers that fit into the neck of your bottle are missing. A little creativity will help solve that problem.
If you have the stopper for the bottle then you can simply use it. I’ve fitted several bottle lamps with the bottles original cork. By simply drilling a hole large enough for the threaded rod to fit through, you will be able to create a solid base for the lamp components.
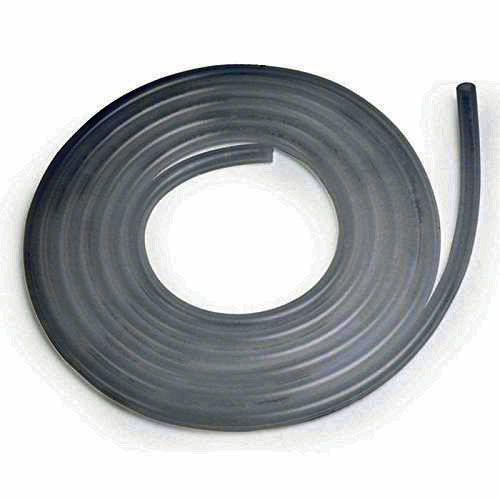
When your purchasing your tubing you will want your inner dimension (ID) to be 3/8″ to accommodate the threaded rod. You outer dimension (OD) will be the size of your bottle’s neck. If you order your hose with the kit you will be able to complete your project all at one time. Your local hardware store might also carry this as well.
Once you have everything together, you will measure your threaded rod and cut off a piece of the rubber tubing to 2/3 the length of your threaded rod’s length. Pull the rubber hosing over your threaded rod into the middle to allow for the top and bottom parts to be threaded on. When you tighten the top piece you will be causing the rubber tubing to expand offering you a nice snug fit.
A little ingenuity will allow you to use the lamp shade that you have with the bottle lamp that you want to create. We would like to thank Peg for sending in her question. If you have another idea that you would like to share please leave us a comment in the section below.
How I turned a square Jim Beam bottle into a flower vase.
Square glass bottles can be intimating to work with when it comes to bottle cutting. It’s tricky to make a cutting score line around corners. A while ago I received the Premium Creator’s bottle cutter and I was a little unclear if this tool was capable of it. Of course I had to put the cutter to the test after my initial review for the Over The Top Bottle Cutter (OTTBC) got an immediate response.
A valid question since it’s predecessor, the Creator’s Bottle Cutter, is the only other bottle cutter on the market that can actually do just that. It was time to answer the question…
My first thought on how to cut the square bottle was to lay it down and rotate it around like a regular round bottle. Of course that wasn’t an option! When the scoring wheels got to the corners of the bottle it would move the wheel out at an angle. The end result would leave me with anything but a straight score line for the bottle separation process.
The original Creator’s bottle cutter works with square bottles by having them stand on end. This makes sense because the flat surface on the bottom of the bottle allows for an even score line.
Here’s the beauty of the Over The Top Bottle Cutter – you can literally take the bottle cutter apart and put it together any way that best suits your bottle craft project. You can accommodate bottles in any shape!
For this DIY project I removed the rollers from the device and simply worked with the goal posts and the scoring head. Once I had the wheel in line with where I wanted to score the bottle, I was ready to go.
I now had everything set up but I was a little apprehensive about actually doing the score line on the bottle. Holding the scoring wheel head in the same, steady position, while rotating the bottle with my other hand, seemed like a tricky task. I wish there was a way to secure the head of the bottle with a tightening bolt, then this whole process would have been a breeze.
After enough procrastination I simply went ahead and did it.
Click the image below to watch my ‘How To Cut A Square Bottle’ video on YouTube:
As you can see in the video, the honey comb surface of this premium bottle cutter allowed the bottle to rotate the bottle with ease.
I really didn’t need to put a lot of pressure on the bottle to get the wheel to make the score. With my left arm resting on my knee to keep a steady hold on the cutter, while my right hand rotated the bottle, I was done in no time at all.
The score line was consistent and I actually got the two ends to meet. A perfect score!
I had a few shards on the lip of the glass bottle. This needed some sanding with my Saber Tooth Diamond Sanding Kit. I’m happy that over 80% of the cut surface was perfectly done. This cut square Jim Beam bottle was something I could actually work with and I definitely count it as a successful DIY project.
Square Jim Beam Bottle Turned Into A Flower Vase
In conclusion, can the Over The Top Bottle Cutter cut square bottles?
The definition of enhance – to improve something, or to make it more attractive or more valuable.
When I reviewed the Creator’s Bottle Cutter four years ago, I couldn’t imagine a more perfect bottle cutting tool. Luckily for all of us, Ray Nicholas wasn’t going to rest on his laurels. With an innovative new design, the Over The Top Bottle Cutter (OTTBC) has the flexibility to enhance the bottle scoring process and allow for more adaptability to conform to different size bottles.
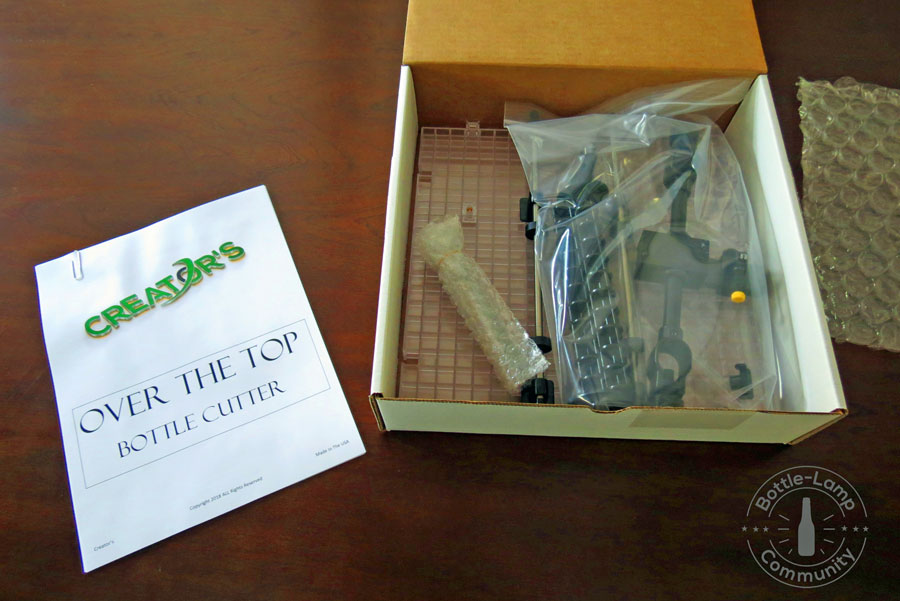
Unpacking – The bottle cutter arrived in a H 3 1/2″ W 12 3/4″ x D 12 1/4″ box. There was a minimal amount of assembly and all the small parts came in a resealable plastic bag. This is perfect for someone who will want to store it away while it’s not in use. The six page instruction manual was printed on 8 1/2″ by 11″ sheets of paper and came with photo illustrations to accompany the directions. I personally felt that this was noteworthy and very much appreciated since I’ve assembled countless pieces of furniture and other gadgets that looked like the information was printed on bar napkins in the smallest font available.
Carefully designed and constructed – The base plate, referred to as a “waffle grid“, is both sturdy and light weight. Both of the “goal posts” have the lug nuts already positioned into the base. Once you have slipped the cross beam that holds the scoring wheel onto the two posts you will discover that this is the only stationary component. Both of the “slide roller assemblies” and the “back stop post” can be re-positioned on the grid. This flexibility allows you to accommodate your varying size and shape bottles.
One size does not fit all – One of the biggest hurdles that any glass bottle cutter has is the size and shape of the bottle that it can score. Many scoring devices can only adapt to beer bottles and small wine decanters. With the Over The Top Bottle Cutter both the swiveling cutting wheel and adjustable back stop will allow you to accommodate many different sized bottles. There is a second “waffle grid” that you can interlock so that you can score even longer bottles!
A bottle craft project – I wanted to do something that would highlight the diversity that this particular bottle cutter offered. I have made a bottle hurricane lamp before but this time I would be doing it with one single tool. By cutting off the end of the bottle and then taking off around the neck, I would be able to demonstrate what the swivel scoring wheel was actually capable of doing.
Shifting pressure points – One of the biggest changes from other bottle cutters comes from where you apply the pressure to the bottle during the scoring process. Previously you would hold the bottle down on the scoring wheel and make the rotation. With the OTTBC, you are now applying pressure to the scoring wheel itself, allowing you more control over the rotation process. Unless you have worked with other bottle cutters this may seem unimportant, but if you’re like me, you’ll notice how much smoother scoring the bottle feels. I found myself putting less pressure on the score which in turn made rotating the bottle a lot easier.
Moving parts – You can really make a lot of adjustments with this bottle cutter. Once I had my bottle into a close proximity to where I wanted to make the score, the final adjustment on the “cross beam” allowed me to get it precisely where I wanted it. Next I wanted to score around the neck of the bottle. I took both “stainless rods” off of the “waffle grid” along with the “back stop post”. By simply removing the extra “waffle grid” and switching it to the opposite side, I was now in position to make my second score. All of this moving around might sound tedious but that’s what make this cutter so special. You can modify it to your own liking and you are no longer confined to the limits of the bottle cutter that you’re working with.
Creator’s Over The Top Bottle Cutter Summary
Having a bottle cutting tool that opens so many doors of opportunity is really a gift. The OTTBC is carefully constructed and working from the original Creator’s Bottle Cutter, more detail has been given to the scoring process down to the catchment of the glass chips that may result while you’re scoring a bottle. Lightweight and easy to set up, you will be able to start scoring bottles in no time at all.
One of the things that I missed from the original was the ruler on the back that allowed you set an exact measurement. This came in handy while I was cutting glass rings (all of the same width and cut from the same bottle) for a wind chime set that I had made. Both bottle cutters use the same scoring head and can easily be replaced when they become dull. I have been using the original one for over four years now and I have only replace that wheel twice.
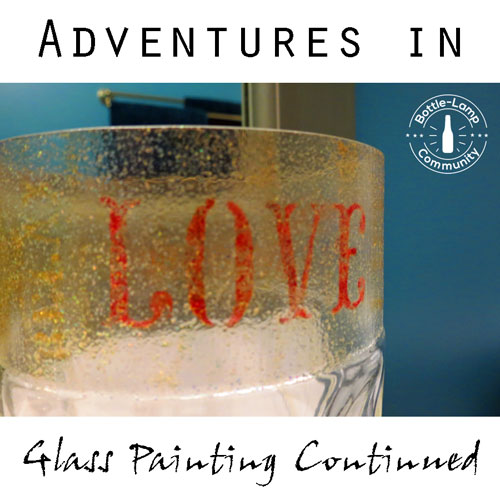
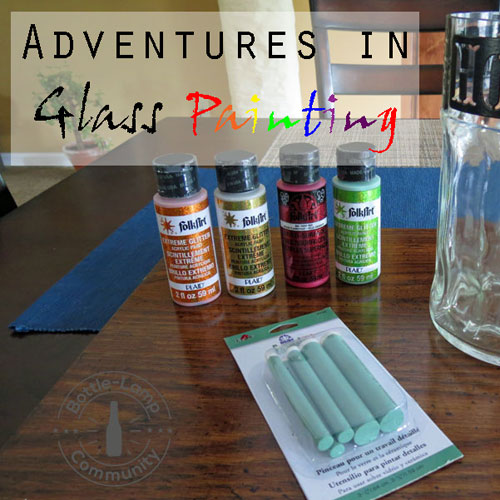
My first attempt at glass bottle painting left me with a lot of room for improvement. In a second attempt to try and improve upon my original idea, I decided to accentuate the wordage that I had stenciled on with an overlaying glitter paint on the outside of the bottle.
The first go around I had painted the back side of the glass. Between the brush strokes and un-even application of the paint, it seemed more practical to go with something that was a little more forgiving when it came to applying it. I decided to overlay all of my text with Mod Podge Extreme Glitter.
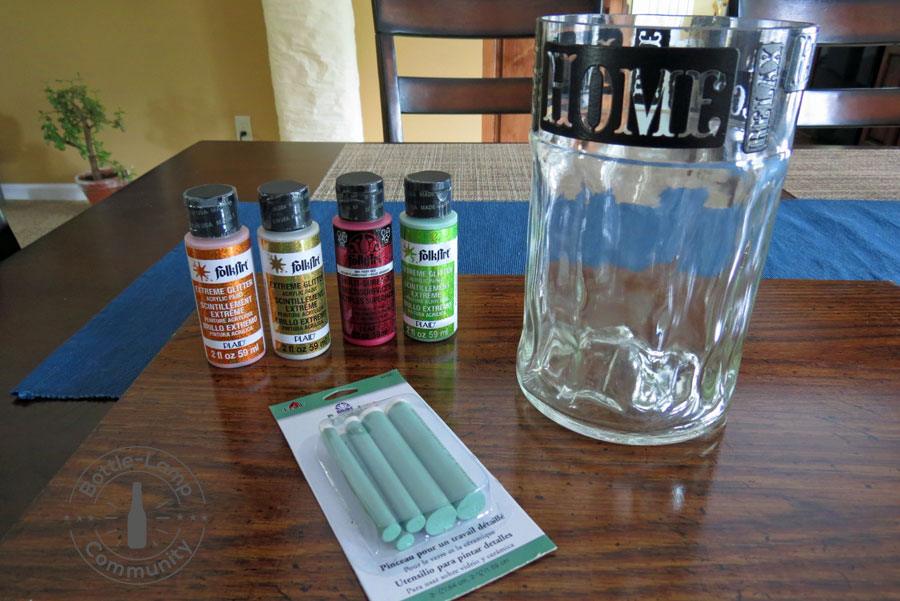
Using the exact same bottle and scoring and separating it in the exact same spot, I was going to re-create the same word lay-out that I had put together on the original.
Taking it a step further, I also went and painted the words with the exact same paint. Once all of the stencil painting was complete I allowed a full day for it to dry. The last thing that I wanted to do was start smearing all of the words together with my top layer of Mod Podge.
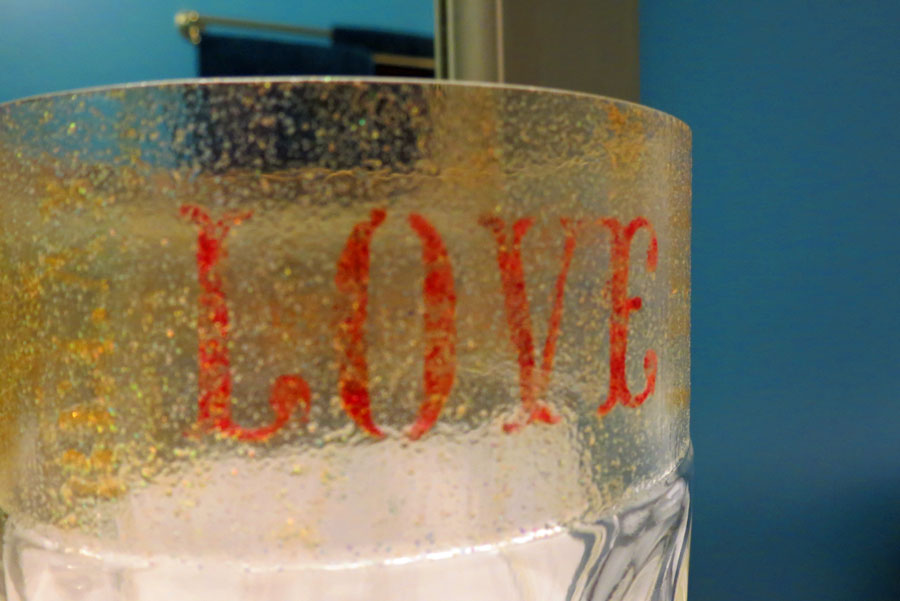
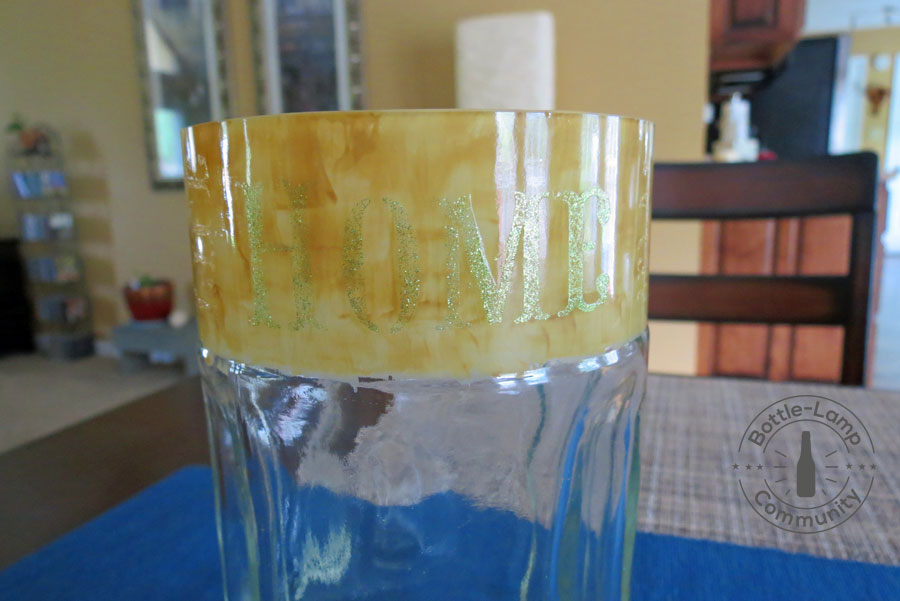
The new final result – Not too bad. It still isn’t exactly what I was hoping for but this is a huge improvement from the last bottle that I had painted. What’s frustrating is that it’s still hard to read all the words that I put on the bottle. Curing the paint helped finalize the drying and eliminated the milky white coloring that the Mod Podge had left behind. FYI – I put the curing instructions in the original post.
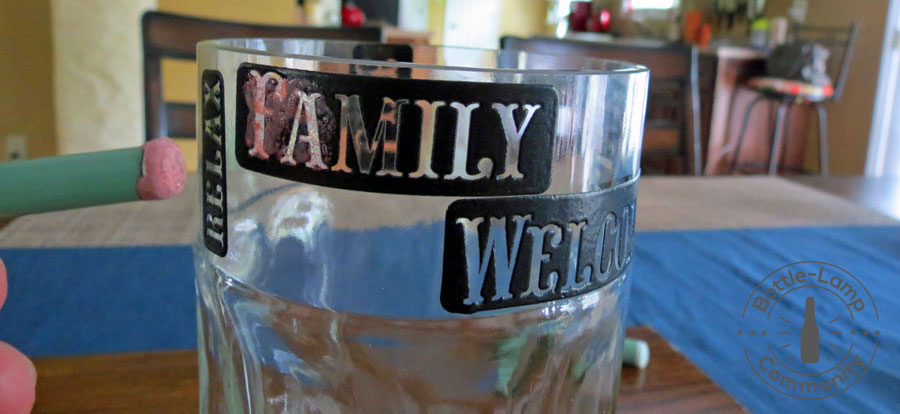
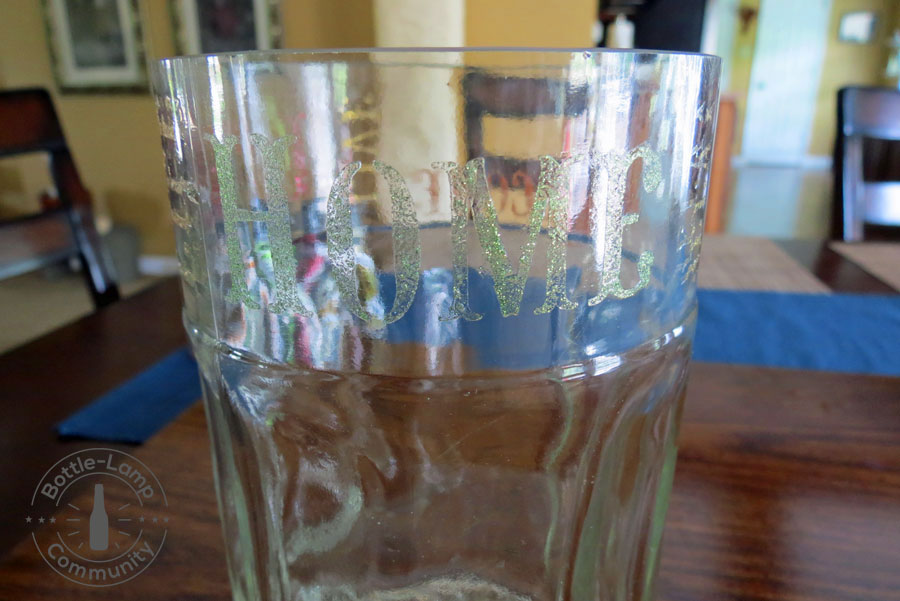
In the picture (above), you can easily see the word ‘Love‘ but sitting right next to it is the word ‘Relax‘. The two colors are too close to being the same so I’ll have to switch to something else if I want to get this to work. On the other side is the word ‘Home‘ which is the same font size as the word ‘Love‘, but it was painted in green and is hard to see as well.
This ones a keeper. I’m not sure what it will be kept for but I’m in no hurry to throw it out. If Silke wants to use it for flowers or a kitchen utensil holder then that’s fine with me. With that said I’m ready to head off in a new direction with the glass painting. I have more stencils to play around with and maybe I’ll try something that isn’t going to go onto clear glass. I’ll have to find some colored glass bottles for my next attempt.
What you envision happening may not always be what you end with.
With so many different glass paints to choose from, I really wanted to venture off into my inner artistic side to make something. Painting free hand wasn’t really my strong suit so the stencils seemed like the next logical choice.
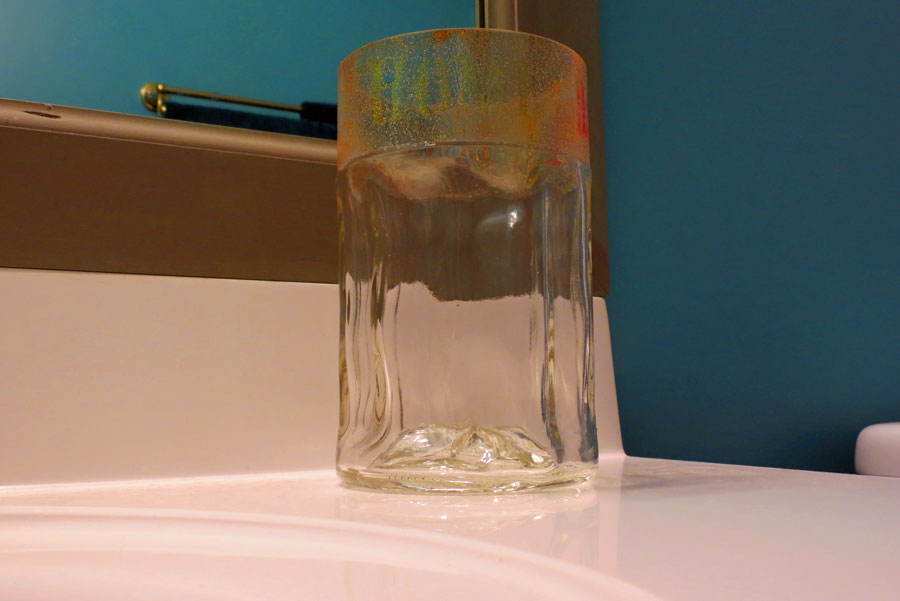
My go to bottle as of late has been the Finlandia Vodka bottle. It’s thick and it has these really cool ridges on the side. By simply cutting of the top I was left with a 1 and 3/4″ flat surface to paint on. A nice even break left me with a minimal amount of sanding and I now had my glass vase ready to decorate.
Using the “Happy Words” stencil set, I set out to place the decals all the way around bottle. Random at first but made coherent by running some of them vertically to keep other words separated. So far so good. Now all I had to do was paint it.
Narrowing down the right colors. Sticking with glitter glues, I used the Fiery Red for the “Love” stencil and green for the “Home” one. Once again, I had envisioned that each word would have it’s own unique color and then just use a fourth color to offset the vertical words.
Applying the paints with the detail painter. I had never used these brushes before but now that I have they make perfect sense. By applying the paint in a dabbing type motion your guaranteed to get the paint into the smaller areas of the stencil without getting paint underneath it. Using the smallest one from the detail set I was able to fill in all of the little nooks and crannies that were there. As per the instructions, once you’re done painting, remove the stencil while the paint is still wet. When I finished with a color I simply went over to the sink to clean up the stencils and brush with mild soapy water. They cleaned up very nicely and placed evenly back onto the stencil sheet so that they could be re-used later.
The detail on the stencils was really impressive. The little detail brushes had worked out perfectly. My only complaint would be that the words were really hard to see. I was hoping that they would have stood out more. I had a plan to fix this. Of course this is the point where everything went wrong.
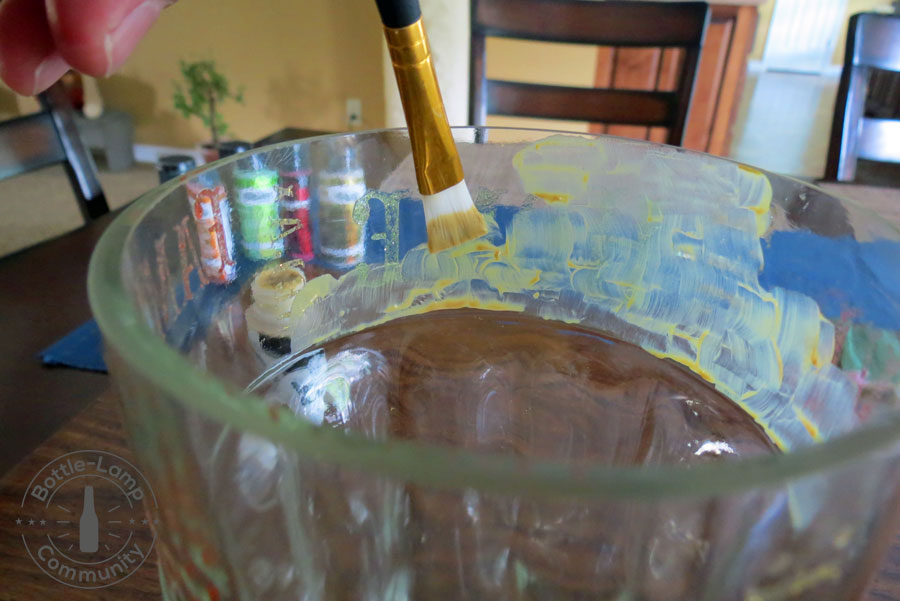
I thought that if I painted the back side of the glass, the stenciled words would stand out more. Using a flat nylon brush I began to paint the inside of the vase. My brush strokes were standing out but I still wasn’t discouraged. I would simply apply a second or third coat to remedy this.
The end result – Epic Fail! Not only did the painting look like a hack job but the words on the outside were still hard to read. By the way, I painted three coats on the interior wall. The weird part is that I really don’t know at this point what I could have done differently to get a better result. Maybe a different color or different type of paint.
There is a final step that you take to seal the deal on this. The bake to cure method used for curing the paints would help make sure that they would stick around for awhile. As ugly as this thing was I went through the process of curing it anyway just so I could see how it was done.
Bake-to-Cure Method Allow painted glass project to dry at least one hour. Make sure the paint is dry to the touch before baking. Place project in a cool oven. Set oven to 350° F and bake for 30 minutes. Turn oven off. Allow glass project to cool down in the oven to room temperature, then remove.
At this point, if the painting had gone a whole lot better, this would have been a really cool art piece that we actually would have used. From here it will eventually migrate to a shelf out in the garage and then maybe some day when I’m grumbling to myself about the excessive amount of things that I’ve collected it will finally make it to the dumpster. It’s just so hard to let go.
The Good – The paint did it’s job exactly as planned. The stencils were perfect and it’s mentioned that they can be re-used up to twenty times! The special little brushes were truly amazing.
The Bad – I can’t paint. Quitting my day job is not an option. If there ever was a starving artist then I’m it.
The Ugly – O.k. maybe I won’t wait so long to throw that thing away.
Let us know about your painting experiences in the comments below. I’m open to criticism. Please, be gentle.
If you ever find yourself in a creative rut, then you might want to look and see what products are available to use.
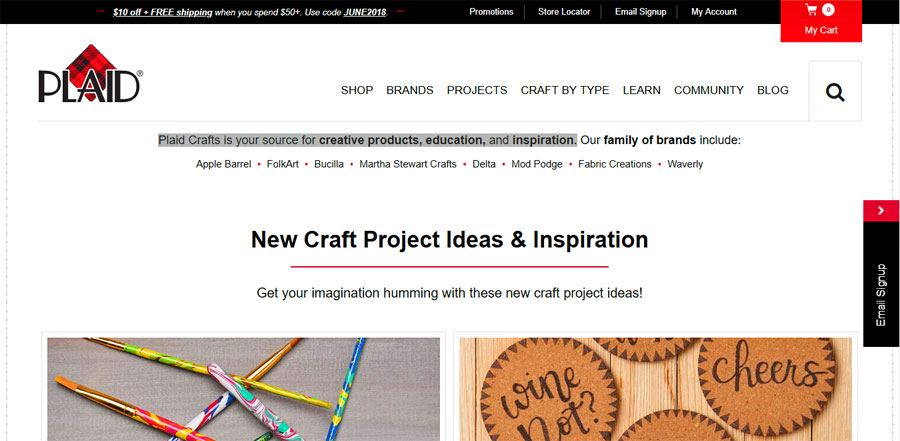
Plaid online has this moto on their home page; “Plaid Crafts is your source for creative products, education, and inspiration.” This was enough to entice me to check out and see what was available and once again find inspiration for my next bottle craft project.
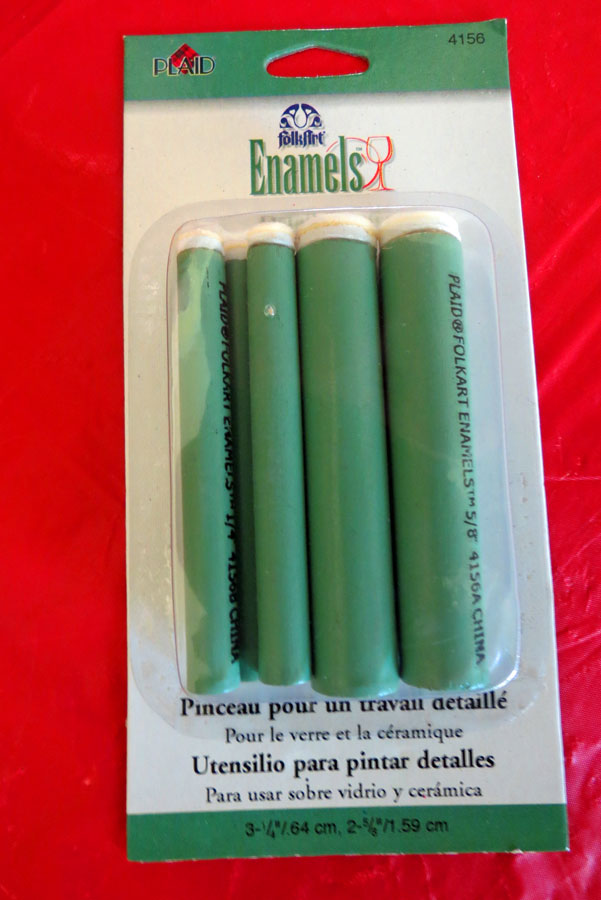
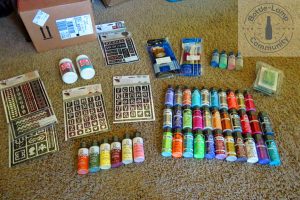
From the many different types of paints to the brushes you will use to apply them, Plaid Crafts has everything that you could imagine. I’ve never really worked with this medium before and it was a little bit overwhelming at first. Paints broke down into; Multi-Surface, Enamel, Chalk, Frosted Glass, numerous glitters and then of course everyone’s favorite – Mod Podge. I soon came to learn that Mod Podge had a variation as well; Extreme Glitter!
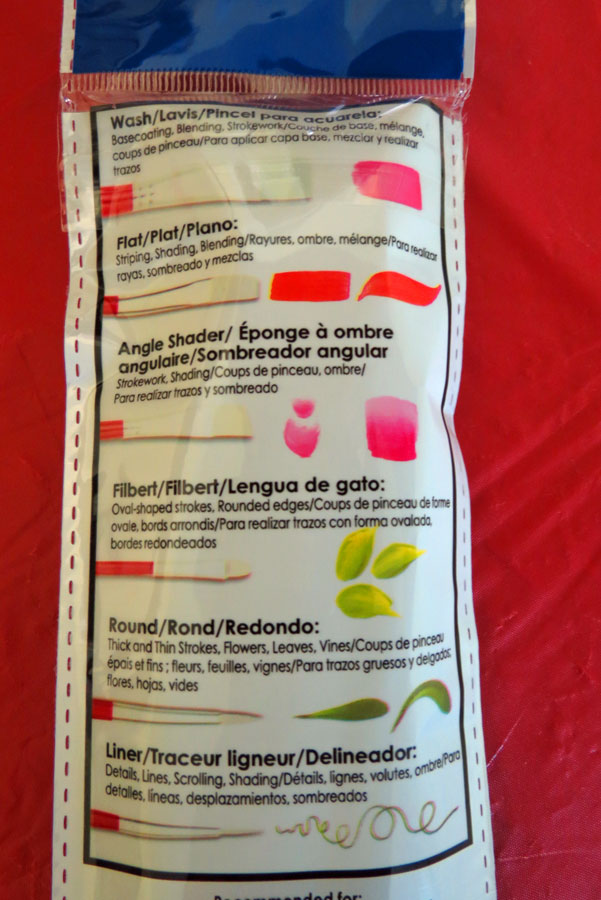
Paint Brushes for every occasion. The brushes that are labeled “Best for Glass & Fabric” looked like the perfect fit for the projects that I had in mind. This pack included; Flat brushes, Scruffy brushes, and Liner brushes. Another paint brush set that was made for Glass & Ceramic surfaces came with six varieties including; Wash, Flat, Angle Shader, Filbert, Round, and Liner. Behind each name was a visual picture that helped me make the connection to what it was that they actually did (I have a lot to learn).
On top of the brushes also came the Detail Painter. These pencil shaped tools will come in handy when your applying the paint to the stencils. By minimizing the bleeding that can occur while your painting, the blunt edge actually pushes the stencil down to the surface to avoid the paint from going underneath. Once again, I didn’t even know these existed!
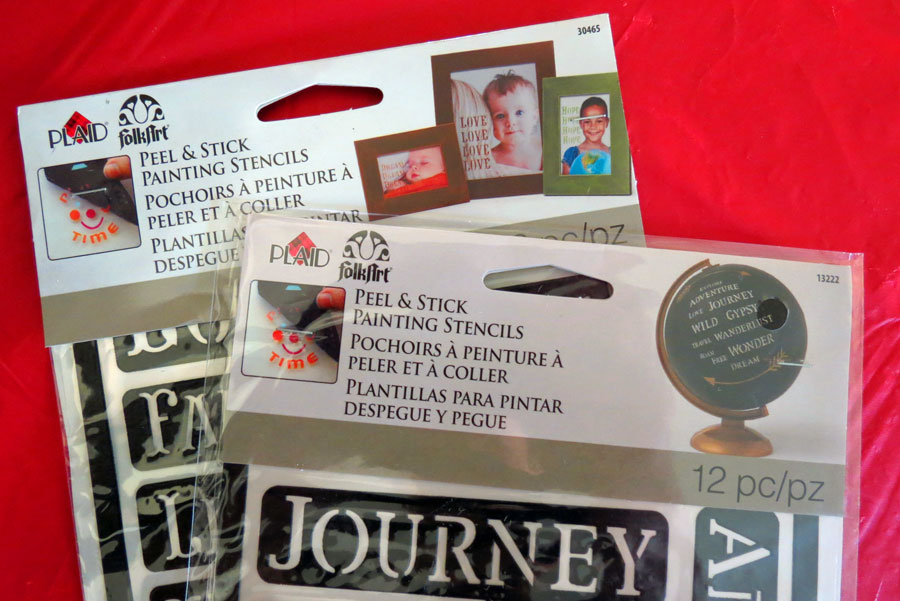
Peel and Stick painting stencils. The endless fonts, wordage, and designs will have you feeling like a kid in a candy store. The ‘Happy Words’ and ‘Wanderlust’ sets got my eye right away. Whatever the occasion or season, you will find these reusable stencils to come in very handy for your craft piece.
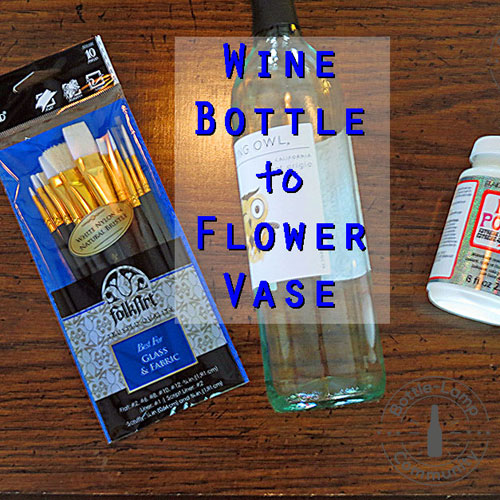
Let’s start simple. I really don’t know where to start at this point so I’m going to try something that looks and feels pretty straight forward. Armed with the Mod Podge Extreme Glitter (a teenage girls dream come true) and one of the Flat nylon brushes, I’m going to transform an ordinary bottle glass vase in an extraordinary flower vase.
With the bottle scored, separated and sanded, it is now ready to begin the painting process. It might be wrong to call Mod Podge a paint but it always goes on looking like a primer so I’ve always called it that. A nice even coat over the whole bottle will not only preserve the label but also give the whole vase the glitter appearance.
Click on our how to video below:
The end result. I was very pleased with the final project. The additional step of applying the sealer and allowing it to dry properly was minimal and it showed really well with with only one coat. Adding another layer would have been easy to do but I was after a more subtle look. Not too glittery but enough to give the shimmery appearance. Mission accomplished!
This was just the beginning. There are more paints, more brushes, and I haven’t even gotten to the stencils yet! Let’s call this what it is; me dipping my toe in bottle glass painting. I will post more projects as they are completed.
I would like to thank Shauna from Plaid Enterprises for all her help and generosity. For more information about the company and products they sell visit them on;
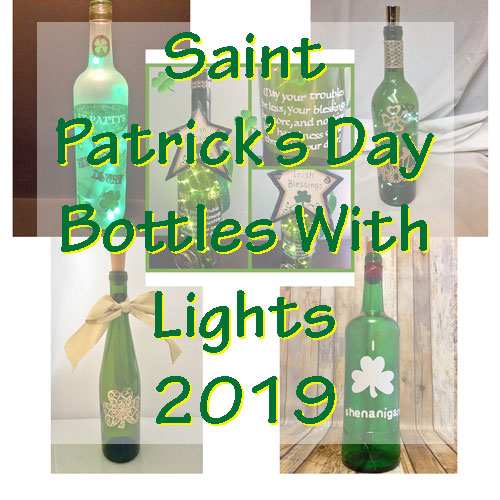
“Your feet will bring you where your heart is.” – Irish Proverb
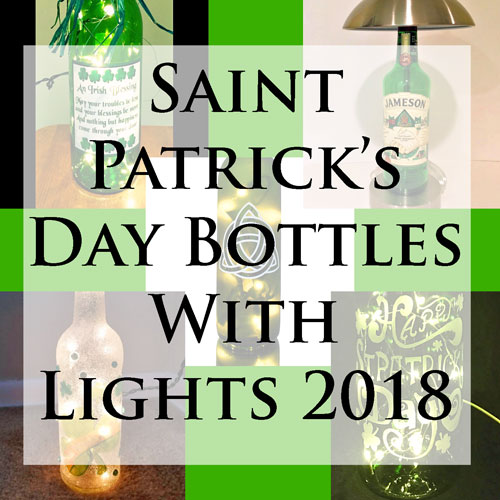
Do you want to have some St. Patrick’s day decor for your home? This Etsy bottles with lights line up will have you set up in no time.
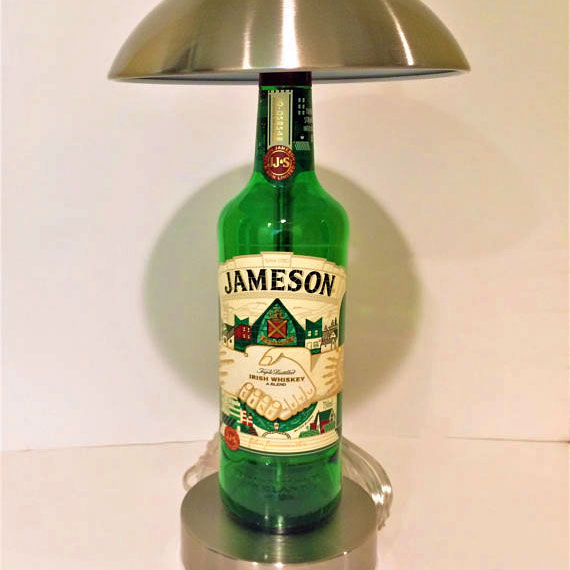
Jameson Limited Edition Bottle, Touch Lamp by Zombie Bottle Lamps
This lamp is turned on by touching the base or the shade, has three settings and the light bulb is included
Glass Etched, Green Sake Bottle Light by Kiss My Glass CLE
Happy Saint Patrick’s Day is hand etched into a green Sake bottle filled with LED String Lights.
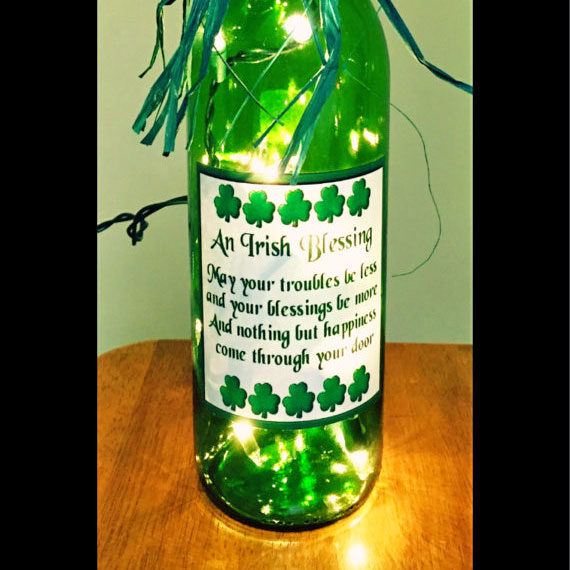
Lighted Bottle Irish Blessing by Mikes Lighted Bottles
This green lighted bottle would be a nice addition to any entry way or kitchen.
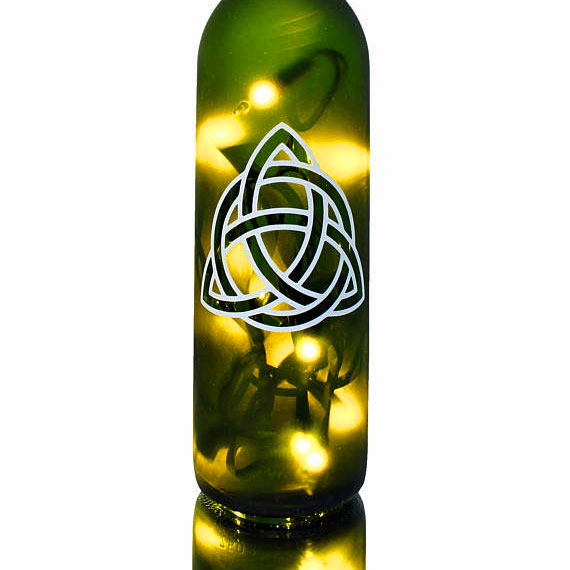
Celtic Lighted Wine Bottle by Classy Garbage
This bottle features a bold Celtic knot design on a frosted, lighted wine bottle.
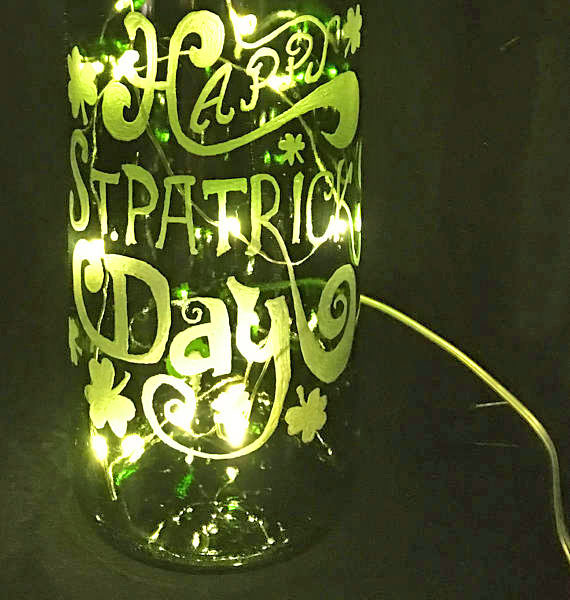
St Patrick’s day bottle lamp with plug in lights by Meredith’s Gifts
This bottle lamp features ‘St Patrick’s day‘ text with an accented light and dark green rhinestones. The glass is coated in diamond dust for a sparkling texture.
These are just a few of the many bottle project you will find on Etsy to help you decorate your home. The thing to remember is that the people who have put together these wonderful pieces are making them with their own hands. The time and talent that the artists put into a crafted item goes beyond anything that you can purchase from a factory.
Leave us a comment below and let us know what you think. Happy St. Patrick’s Day!
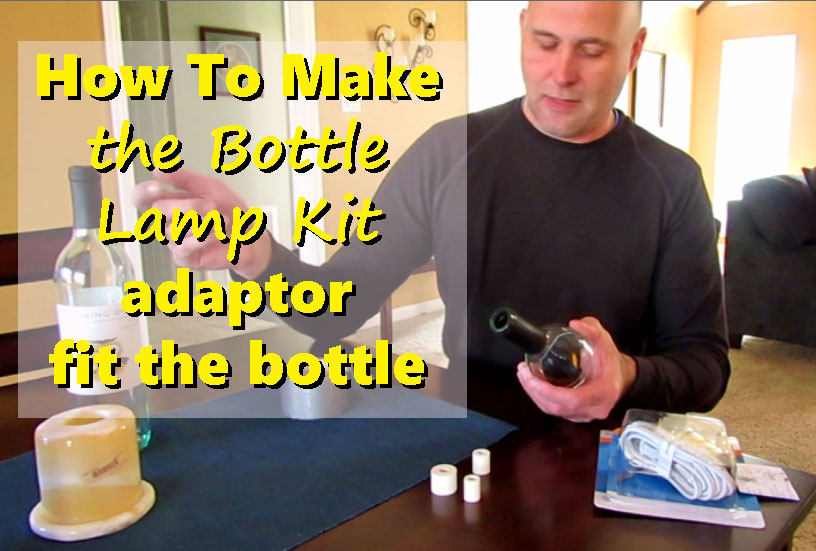
The bottle lamp kits that come complete with all your accessories might need to be modified.
One of the most recurring questions that we get for the bottle lamp kits are the ones concerning the rubber adapters that should fit the neck of the bottle. Most kits come with three varying sized adapters that should cover all the different bottle necks sizes quite nicely. Unfortunately, they all seem to fall short or are way too big.
The fix is really simple and only requires a small amount of everyone’s favorite go to fix it, ‘Duct Tape‘. Yep, that’s right, that universal essential tool, all-purpose duct tape that can be found in everyone’s tool box. Versatile and never out of fashion a couple little strips of the duct tape will have you up and running in no time.
By ripping off a strip of duct tape the width of the adapter and adding a few layers to it, you will then have a more snug fit for your bottle’s neck. Having the duct tape the width of the adapter will also make it easier to conceal the adapter. You really don’t want the duct tape to show so this makes it easier to hide.
The corresponding video on how to make the bottle lamp kit adapter will give you a better visual idea of what to do.
Hopefully this will make it easier for you to complete your bottle lamp project.
Leave me a comment if you have any questions!
Do you have a DIY project you would like to show off?
Submit your entry – include your picture(s), your name and a description and or any tips you would like to share with us and our readers. If you have a blog you can also include the web address and we will link back to you.