Have a question? Ask Nick & Silke, the owners of Bottle-Lamp.com.
We’re your DIY Bottle Crafts headquarters and teach you how to make a bottle lamp, provide you with valuable resources and how-to videos.
Related Pages –> Testimonials – FAQ – Privacy Information – Thank You
Learn more about us, Nick & Silke Jager… we’re a married couple with grown children and have a passion for family, writing, reading, teaching, traveling and of course, making DIY projects from recycled glass bottles and other materials. We have been making bottle crafts since 2007. Scroll down to send us an email message…

Did you finish your bottle project or want to share a craft blog, link or tip? Submit Here
Do you have a bottle craft question? Don’t hesitate, simply use this contact form or leave us a comment below.
Send us an email:
We will get back to you. That’s a promise! Best wishes and happy crafting, Nick and Silke
Submit your craft photos to our Facebook community page here – Facebook.com/BottleCraftsDIY
Follow us and share your bottle craft pictures on Instagram here – Instagram.com/BottleLampCommunity
Trouble with the email form? Send us an email to contact@jagerfoods.com
it’s true that your website is very good, and it’s all well organized here.
Thank you Alice, we appreciate the kind words. Nick and Silke
When making a lamp with shade, the kit you show for the top part does not have a harp. I am confused as to wether I need a harp or not. Can you please advise. Love yours site, can’t wait to make my first one.
Thank you,
Liz
Hi Liz, Thank you :)!
There are different kinds of lamp shades as well as lamp shade kits available. The kit with the harp (available at Menards) needs a lamp shade with a small hole on top to attach to the harp. I think this one is used mostly for bigger lamps like floor lamps or larger table lamps.
The lamp kit we usually use, the one we have on our resources page (Westinghouse #70025 Make A Lamp Kit), uses a lamp shade that sits under the light bulb. We have purchased several inexpensive lamp shades that accommodate this kit at Walmart. You can add your own style to these lamp shades by adding trim, beads, fringes, etc.
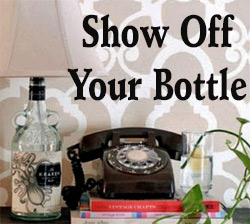
Hope this explanation makes sense, let us know if you have any other questions. Be sure to send us pictures of your finished bottle lamp for the DIY Show Off page.
Thank you so much for the info. Can’t wait to get started. Will definitely send pics when done.
You’re welcome Liz, we’re looking forward to seeing your bottle lamps.
loved the video on youtube. i have been wanting o make these and glad i came across it. i was trying to look you up on facebook…are you listed?
joan
Hi Joan,
Yes, the link to our facebook page is: http://www.facebook.com/BottleCraftsDIY
We’re glad you enjoyed watching our video. Be sure to share your finished bottle with us by emailing it to us or simply upload a pic to our facebook page.
Good luck, Nick and Silke
I wish to convey my affection for your kindness for those people who need help on in this niche. Your real dedication to passing the message up and down has been especially interesting and has really encouraged those much like me to realize their endeavors. Your entire useful recommendations signifies a whole lot to me and even more to my peers. Thank you; from all of us.
Dear Zygor, thank you so much for your kind words. We have truly enjoyed the connections we have made through our blog. It’s been a wonderful experience so far, and we love receiving your emails, answering your questions and especially seeing your finished bottle crafts.
Following the directions…They are great but when I get to the second hole the bottle cracks…what am I doing wrong?
While drilling the second hole, is the drill jerking in your hand? It might be binding up and you might want to go with another size drill bit.
No drill is not…I thought it might be I was using a cool bit and the glass was still warm from the first drilling?
If I don’t use the second size bit how will I open enough to get light in?
You’ll need to make the hole big enough for the lights to go through. Maybe a smaller sized drill bit then the second one you’re using. You’ll have the first one, which is your smallest, a second one, that’s a little bigger then the first, and finally you’re third drill bit, which will drill the hole to size for the lights.
It may get warm but you’re switching it up with the different sized drill bits. The only other thing I can offer is pressure. Ease into it. Don’t push too hard and let the drill do the work for you.
I hope this helps. Let me know how you’re progressing.
nick,i seem to only get 2 bottles cut with the the pilot bit who sells the best one? im in henderson, nv.
Rick,
Are you working with the glass drilling bits that are shaped as spades? I’ve used the Vermont American drill bits and I’ve done way more than just two bottles.