Tips for drilling a glass bottle if you feel apprehensive about it.
You’ve had that special bottle tucked away in your closet for a very long time. Every once in a ‘blue moon’ you’ll take it out and wipe the dust off it to reminisce, only to return it back to the closet. It’s sentimental value far exceeds anything anyone could offer you on E-bay for it and so you continue to hold on to it.
Scroll down to find out the best glass drilling techniques so you can proudly display your keepsake bottle(s).

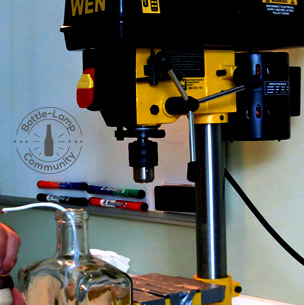
Using a drill press is the fastest way to create a hole in a glass bottle.
Rather then leaving that vintage bottle or old sentimental favorite tucked away, try dressing it up with lights or a lamp kit so that you could not only display and use it, but the bottle will also suddenly become it’s own conversation piece.
The apprehension that you feel about even risking a chance to break your keepsake bottle are completely normal. I would never recommend running out to get a drill press and glass drill bits, and then just ‘giving it a whirl’.
My approach would be to practice on some lower end glass bottles before you even attempt to tackle the sentimental favorite. We’ve offered tips for drilling on a square bottle before and we go into the drilling process in our video and e-book as well.
I’ve broken my share of bottles before, but I must admit that my confidence level has gone up considerably from when I first started. As with anything in life: ‘the more you practice the better you get at it’.
Here is some advice to shed light (no pun intended) on the glass drilling techniques, if you feel apprehensive or have trouble:
- Use a new glass drill bit for your special keepsake bottle. Have you drilled a few bottles with the drill bit you’re using? It may just be dull. I ran into this problem, and didn’t realize that I was over compensating by pushing harder to make it drill. (broke a few myself)
- Study your bottle shape before you start to drill. If your drill bit is still fairly new then you might want to look at where your drilling the hole on the bottle. I usually come up about an inch from the bottom. The base is sturdy and usually has a thicker glass that will compensate for drilling in the side.
- Keep your drill bit cool.If your drill bit is getting really hot during the drilling process you need to cool it down. You might want to put a barrier around where it is that your drilling and put water inside. I tried this with ‘Play-Do’ once, and the water just leaked around the edge. A clay ring or plumbers putty should do the trick. Store it in a Zip-loc baggie and you can use it over and over again for all the bottles that you undoubtedly will drill in the future.
- Use a drill press. If you just want to drill one hole in a bottle than by all means use your electric drill. After a little practice you will be able to get a nice hole in your special wine or keepsake bottle. If you think you’ll want to drill holes in several bottles, and maybe find a few other uses, than investing a little bit of money in a drill press is well worth it. The WEN drill press I use is routinely on sale for under $70 and does a phenomenal job. You will have a perfectly round, clean hole in mere seconds.
If at this point you still don’t see yourself even touching that saved bottle then the only advice I can give is – Don’t do it. The last thing I want you to do is wreck your treasured bottle… you’ll end up cursing my name from here ’til eternity.
Good luck and happy crafting,
Nick
Do you have a question about drilling glass bottles, finding bottle project resources or do you simply want to say ‘hi’? Leave me a comment below.

I love reading about your bottle projects and seeing the results! I love that you are so generous with all your tips and techniques. Thank you!
Rachel,
Thank you for the compliment. I think we get more out of helping people with their own projects then we do actually doing our own. :)
I to use water, at first I used a light grade of oil, but found that water cools better than oil