Creator’s Bottle Cutter Review By Bottle-Lamp

Creator's Bottle Cutter

If you are looking for a methodical way to cut glass bottles, with consistent cuts, then let me introduce you to a bottle cutter that does exactly that.

The Creator’s Bottle Cutter (CBC) was mailed to me by the inventor and upon arrival I inspected the conforming box that the device came in. A full color attachment showed the bottle cutter and a few of the projects that you could create using cut bottles. The box was surprisingly light weight and the cutter came turn key out of the box. I was more than ready to begin scoring.

Creator's Bottle Cutter Still In The Box

The Learning Curve – I was a little confused at first on how to properly use this bottle cutter and this resulted in less than adequate scoring. It was my apprehension of pressing on the bottle that ended up being the problem.

The scoring wheel sits on a spring that regulates the amount of pressure that’s being put on the bottle. You can’t really press too hard… since the bottle is resting on the rollers that’s as far as you can push it.

Creator's Bottle Cutter Device

Creator’s Bottle Cutter Device

The Technique – By lowering the scoring wheel and tightening it down you are ready to position your bottle. Once the bottle is in position you simply release the scoring wheel and allow the spring to push it up against the bottle.

Carefully rotate the bottle around the base, holding down on the main part with the sheathing device and rotate the bottle with your other hand. After I figured out the proper technique I was ready to go.

Taking bottle cutting further.

It was very impressive to see consistent cuts coming off the CBC device. This alone was gratifying to me, but the CBC is so much more.

Once you set the device in the upright position you will notice a measuring scale that shows the length of your cuts. Being able to regulate the length of each cut is huge when it comes to doing bottle crafts that have multiple, identical length items.

Creator's Bottle Cutter Measure

Creator’s Bottle Cutter Measures Up

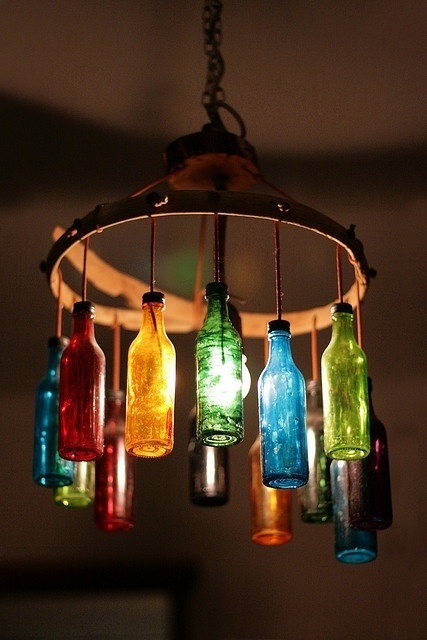
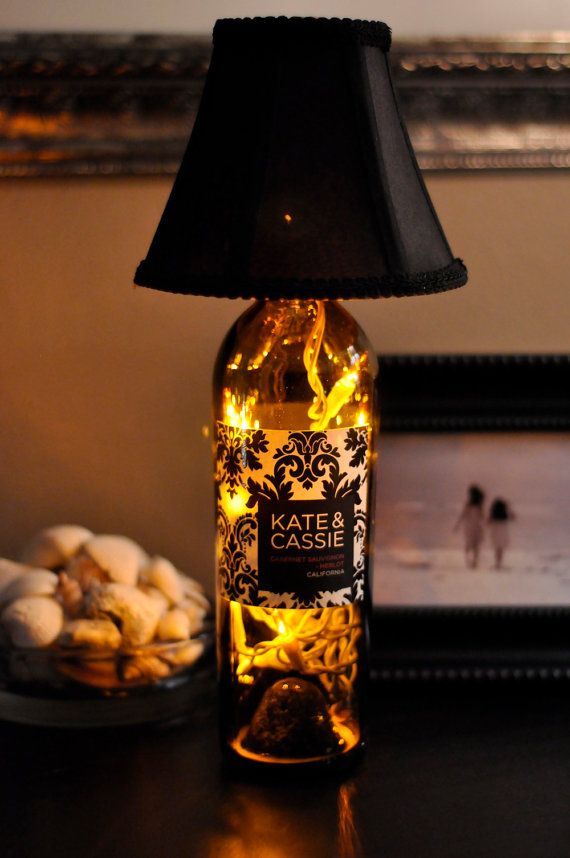
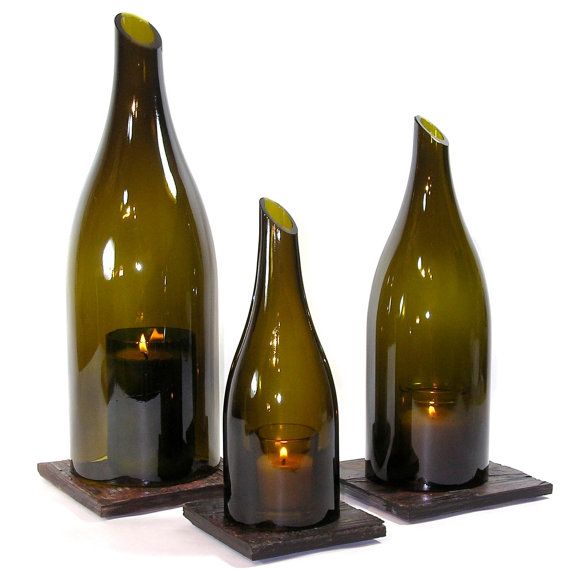
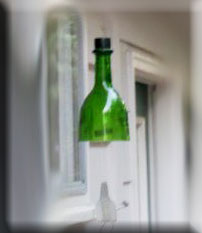
I’ve always wanted to create a pendant light with multiple cut bottles on it. I want to have them all cut to the same length. Just like the beer bottle glass sets would seem a little strange if one glass was taller than the others. “Mom, how come Billy always gets the taller glass!?” Once I figured out how the Creator’s Bottle Cutter worked I was ready to try different things like cool looking pendant lights that I wasn’t able to do with any of the other bottle cutting devices that I had used.

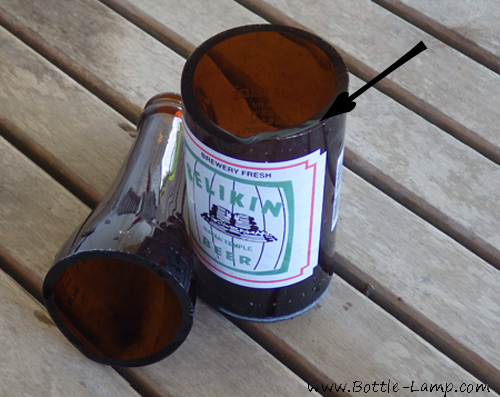
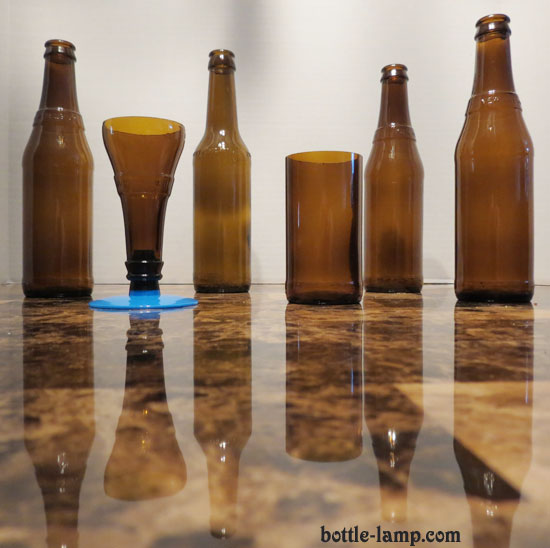
The picture below shows multiple scores on the same bottle with 1″ high rings. Given the length of the beer bottle that I was working with I ended up with a top and bottom with three perfectly sized rings upon completion.

The scores went down perfectly and the separation was flawless. I lined all of the pieces up and marveled at how easy the whole cutting process was.

Creator's Bottle Cutter

Bottle dissection using the Creator’s Bottle Cutter

Finishing – Taking a light grit, wet sand paper to the edges of the cut bottle is highly recommended. Little shards are usually left behind after making the break. You want your edges to be smooth, not only for the end user (nobody wants a bloody lip), but for the look of your project as well.

The separation on all of the score lines I did was so precise that I really didn’t need to spend a lot of time sanding the bottle edges. I simply smoothed out the edges.

Creator’s Bottle Cutter Review Summary

With the ease in which you can score and separate your bottles, I found the Creator’s Bottle Cutter to be the perfect glass cutting tool for the types of projects that I wanted to put together. With a price tag of under $80 you are getting a top of the line bottle cutter.

Sturdy and easy to use, you will have a glass cutting tool that is built to last and will provide you with a consistent performance. This was huge for me given what I intended to do with it. I have been able to get other devices to separate glass before but no two pieces were ever completely identical.

The Creator’s Bottle Cutter will allow me to make all of my thought up bottle craft projects a reality.

I had a chance  to talk with Ray Nicholas, the President of Creator’s Stained Glass Inc. 

Along with the CBC, Ray has also invented numerous other glass cutting devices, like the Bottle Neck Cutter and the Linear Scoring Module, as well as other useful items that can all be found on his company’s web site. In conversation we talked about all the time he puts into creating his patented devices and how he likes to tinker with things. Ray is always trying to improve upon any given product!

Creator’s Glass Bottle Cutter

All of the Creator’s products are Made in the U.S.A.

Creators Bottle Cutter Instruction Sheet

Share your bottle cutting experiences with us, good or bad, in the comments below.


The Minnesota Wild Bottle With Lights By Jessie

Moving to another state doesn’t mean you have to trade off your favorite sports team. You just have to find a new way to show your support. Thanks to Bottles Be Glowing, you can do just that!

Jessie from Bottles Be Glowing has created several NHL hockey lighted bottles and when I read that she was planning to put together a MN Wild one, I was eager to get my hands on it. Anticipating how she would put it together was more than half the fun!

BottlesBeGlowing MN Wild
Minnesota Wild Bottle With Lights

It was posted onto a social media website with the caption – “A little ice, a puck and an empty bottle = a perfect time to make a Minnesota Wild Bottle light”

This was brilliant! The frosted glass looked like an ice rink and the Minnesota Wild logo was prominently displayed in the middle. By adding color matching bling and a pennant with whistle to top it all off, the whole hockey theme was complete.

Mesmerized but still of sound mind I quickly claimed the lighted bottle before someone else did. When you have as many fans as the Wild do, you have to act fast on something like this. I would have never forgiven myself if I had let this one slip by.

Minnesota Wild Gear
Minnesota Wild Gear courtesy of Bottles Be Glowing

Shipping and receiving –  I have to share with you my experience while purchasing this bottle. To sum it all up it was fantastic. The minute I submitted my payment I was told when my bottle would ship. The next day I received an e-mail with the tracking code so I could follow its progress.

When it arrived I felt like a kid at Christmas again. The same care and attention to detail that had gone into creating this unique one of a kind item had been given to the packaging as well. The bottle was carefully wrapped in bubble wrap and filled in with air bags on the sides to prevent it from moving around inside the box during transport. I didn’t waste a second and immediately plugged it in. Silke and I stepped back and marveled for at it for awhile.

MN Wild Bottle Light

I’m telling you from first hand experience that when you purchase something from Bottles Be Glowing you will not be disappointed. More than the item itself you will be receiving a hand crafted item that is handled by the person who made it from start to finish. I have another bottle of my favorite NFL team also from Bottles Be Glowing and the same quality and care has been consistent with both.

If you would like to check out more bottle lights from Bottles Be Glowing be sure to “Like” them on their Facebook page. You can also see more of the bottles on the Etsy store.

The 5 Most Viewed Bottle Lamp Projects

Our 5 most viewed Bottle Lamp Projects on the internet.

The bottle lamps we are featuring here are just a small fraction of projects with recycled glass bottles we have done in the span of three years. While looking back at all of our past bottle lamp projects it amazing to see which ones get the most attention.

We have compiled a list of the five most fabulous bottle lamps, judging by the amount of views they have been getting across the different social media sites:

Bottle Lamp #1

Wine Bottle Lamp
Toasted Head wine bottle lamp

The Toasted Head wine lamp came together because of a contest on Facebook. Toasted Head sponsored a crafters competition and this was our entry. Sadly we didn’t win the first price, but that’s alright. This lovely lamp is perfect in our sun room and makes a great functioning keepsake.

Bottle Lamp #2

Makers Mark Bottle Lamp
Maker’s Mark Bottle Lamp

Maker’s Mark is our best friend Mark’s favorite whisky. We were able to sneak an empty bottle from him and made a birthday present that he uses every day. No frills or add-on’s were necessary to make this bottle lamp work.

Bottle Lamp #3

Pink Floyd Wine Bottle Lamp

We picked up this Pink Floyd ‘Dark Side of the Moon’ wine bottle at a wine specialty store for under $10. One look at the cool label and we knew it had bottle lamp potential written all over it. We sold it this unique glow in the dark bottle on Etsy a while ago.

Bottle Lamp #4

Seagram's 7 Bottle Lamp
Seagram’s 7 Bottle Lamp

Seagram’s 7 and 7 Up (AKA Seven-Seven) is Silke’s drink of choice. Finding the perfectly colored lamp shade to match the red in the label brought this lamp together beautifully. This was one of the very first bottles we ever made that has the separate on and off switch on the power cord.

Bottle Lamp #5

This Captain Morgan Bottle Lamp

This Captain Morgan Bottle Lamp was created especially for a giveaway we held two years ago. The lucky lady was so excited to win it that she offered to drive 60 miles one way just to come and pick it up! We met her half way :) Since then the image of this bottle has been pinned on to hundreds, if not thousands of Pinterest boards.

Working with recycled glass bottles is such a fun and rewarding hobby! We have a hard time looking at any type of recycled glass bottles now without imagining a potential future craft project. 

The bottle lamp community is always growing in terms of people, content and of course project ideas. We have enjoyed sharing our projects with you, as much as we have enjoyed receiving them back from you, our visitors.

If you would like to share your own recycled bottle crafts for our DIY Show Off page send us an email here.

Which one of the fabulous 5 Bottle Lamp projects do you like best?

Can you even pick a favorite? Leave us a comment below.

Don’t forget to share these bottle lamps to your favorite social media site!

Happy bottle crafting,

Nick and Silke

From Bottles to Lamps

unique bottle chandelier

Are you looking for inspiration for your next bottle craft project? Pinterest is a great place to visit.

Pinterest is a visual discovery tool that you can use to find ideas for all your projects and interests. There are literally hundreds of different wine bottle lamps and recycled bottle creations.

In this article we are featuring a few of our favorite bottle lamp pins.

wine bottle lamp on pinterest
Kate & Cassie Wine Bottle Lamp

A favorite wine bottle lamp makes for ambient lighting. This is a bottle of wine you would pick up in the store just for the awesome looking label. You can get step by step instructions on how to make this lamp in our Recycled Bottle Lamps book.

unique bottle chandelier
Colorful bottles make this a one of a kind chandelier

This is a very clever idea for re-purposing an old chandelier. Collect several green and white wine bottles with twist off caps. Remove the labels and paint the clear ones in different colors. Drill a hole through the bottle cap and attach the bottles around the chandelier.

wine bottle hurricane lanters
Wine Bottle Hurricane Lantern Trio

For this craft project you would have to straight cut the bottom of the bottle and make another diagonal cut at the top. This allow the heat of the candle to rise through the top, of course there is already a bottle opening, so the cut on top is for ascetic purposes only.

Upcycled plumbing lamp

Here’s a project for the man cave! You can set this up through any combination of upcycled or new pipe fittings. Just be sure to allow enough room to feed your electrical wire through.

Horizontal Table Lamp
Horizontal Wine Bottle Table Lamp

Who says a wine bottle lamp needs to stand upright? This is the perfect desk or coffee table accessory. You can recreate this awesome lamp by using an upcycled pendant light, a couple of clamps, an Edison light bulb and a home made stand.

There are many more recycled bottle project ideas to be found.

Take a look at our Bottle Lamp Board on Pinterest.

Where do you find inspiration for your craft projects? Leave us a comment below.

DIY Steps for Cutting a Glass Bottle

Cut Belikin Beer Bottle

Silke and I have been house sitting in Toledo, Belize for a little over a month already!

One of the things that I wanted to bring with (next to the bug spray and sun screen), was the Kinkajou bottle cutter. With all my ‘extra time’ that I was now going to have, this seemed like the most opportune time to really get to try out the cutter.

The very first glass bottle that I found on the shore turned out to be my first attempt with the bottle cutter while here in Belize. It went down perfectly.

Cut Rum Bottle, Belize Rum

Here are some steps You can take to help guarantee a successfully cut Bottle with the Kinkajou:

  1. You want to make sure that when you are tightening the bolts down to secure the clamps around the bottle that the spaces on both sides are even.
  2. Don’t over tighten the clamps. You want to be able to allow the bottle to rotate freely while you’re making the score line.
  3. Once you’ve made an entire rotation, you should hear a very distinct popping sound. Stop rotating the bottle and remove the Kinkajou device. You are now ready for the separation process.
  4. Prepare boiling hot water. You will alternate between hot (first) and cool water (second). Using the cold water from the tap is adequate for this step.
  5. Pour the boiling water directly over your score line. Rotate the bottle during this process so that you cover the whole thing.
  6. Move the bottle over to the running tap water and rotate it once again, this time under the faucet. You might want to have a rag in the bottom of your sink during this process so when the bottle does separate it will have a soft place to land.
  7. Repeat these last two steps until you have successfully separated the bottle.
  8. You are now ready to sand the edges of the glass where the separation took place. Using a heavy grit sand paper with a little water on it will allow you to remove the sharp edges. You can follow up with a lighter sand paper grit for a nice smooth finish.

For a visual demonstration of the Kinkajou bottle cutter watch my video:
Kinkajou Glass Bottle Cutter Tool – How to Cut a Bottle

Belikin Beer - The Beer of Belize

I found that the local Belikin* Beer bottles would be a little bit of a challenge.

* The Belize Brewing Company was established in 1969. Located in Belize City, Belize they produce Lighthouse Lager, Belikin, Belikin Premium, Belikin Stout (my personal favorite), and Guiness Stout.

The first problem that I encountered was during the scoring process. The score line would not connect after a full rotation. After scoring four of the same type of bottles I finally got one that was close but not perfect.

The Rum bottle I found on the beach had been so easy that it just didn’t make sense that I would be having problems now. I even went the extra step of measuring the distance on the clamps so that I knew they would be symmetrical before I began the scoring process.

Beer Bottle Cutting in Belize

Belikin Bottle Cutting in Belize

The separation process took longer. During the first bottle separating process, I actually ran out of hot water! After boiling a second kettle it finally gave way. After the separation, the first thing I noticed was how thick these glass bottles were. The hand held glass cutter that uses the teeth to remove any excess jags of glass wasn’t even big enough to fit on it.

I attributed all of this headache to the thickness of these particular glass bottles. I did get a few to work with minor flaws but even those took awhile to sand down. I’m bringing the best one that I have home with us as a souvenir.

Cut Belikin Beer Bottle

I’m glad I brought the Kinkajou with for our trip to Belize. I got to play around with the device and the next house sitters will be all decked out with handmade votive candle holders and rum glasses.

Tips for Cutting Beer Bottles


Do you have a DIY project you would like to show off?

Send an email to contact@jagerfoods.com with your picture(s), your name and a description and or any tips you would like to share with us and our readers. If you have a blog you can also include the web address and we will link back to you.

The Hunt For ‘Crystal Fill’ Part Deux

I had written the first Hunt for ‘Crystal Fill’ article last September and whenever people would ask where to get it, I simply referred them to that post.

After following the link I provided on that post as well as the one on our supply page it soon became apparent that it was an item that was getting harder to find.

Just to bring everyone up to speed: The crystal fill was the content that I had added to one of the lighted bottles I had made and was mentioned in our ‘How to make Bottle Lights *DIY Wine Bottle Light*’ video.

Save-on-Crafts was a bust and Amazon can’t seem to keep it stocked, or it is no longer available.

Here are some other places and alternatives to the crystal fill:

JoAnn Fabric and Craft Store – This was the place that I originally found the crystal fill and it was where I got the idea. Not everybody has access to these stores locally, but if you have one nearby you will find that they have a ‘clear diamond ice filler’ that would work the same.

Clear Diamond Ice Filler

Another place that you can check for availability is online at E-bay. The seller’s name is glassvasews and the crystal fillers are listed as a top-rated seller. The downside here is that your buying a bulk item and you have to pay for shipping.

If you’re going out to search for crystal bottle fitter yourself, in your local stores or online,  just keep in mind that it comes under a few different names (i.e. vase filler, floral filler, and crushed glass).

Why use Bottle Fill in your DIY Project?

Having the crystal fill in the bottle gives the lights a more uniformed look. It also conceals the light string itself, and adds some stability to an otherwise empty bottle.

You can take this a step further by purchasing white LED light strings. The white cord is easier to conceal and the LED light strings give off no heat at all and are very energy efficient.

Good luck with your DIY projects and remember to send a picture of your finished bottle lamp to share on our DIY Show Off page.

bottle filler for DIY projects
Bottles with Crystal Fill

Do you have a ‘go to source’ for your craft supplies that you would like to share? Please leave us a comment below.

Cut Bottle Wind Chimes

We received the following inquiries from a Bottle-Lamp website visitor today and thought maybe you have been wondering about the same things?

Rick had been visiting our Bottle Cutter Review page. Take a look at his questions, then scroll down for Nick’s answers.

Where do you get your bottles? I do not drink fast enough.

Second, on the bottle wind chimes it was mentioned that you used a ring or washer to hang the ball. I am not sure how you used them. Are they wedged in the bottles throat or glued flat on the top.

Third, what size are they? Thanks, Rick

cut glass wind chime
Glass Bottle Wind Chime

Rick, All good questions.

1) The bottle question was one I was actually concerned about when I first started bottle crafting.

My intent was to sell them on-line. Long story short; once word got out that I was cutting and drilling bottles, everyone was soon enough setting them aside for me. Silke and I were officers at the Elks Lodge at this time as well and we requested that they set certain bottles ones aside (You can ask at any bar in your neighborhood and once you explain what you’re doing you’ll be amazed at the response).

2) The bottle wind chimes were put together using fishing line fed through the neck and a decent size washer was simply tied to the end. The bottle hung off the washer.

Gravity works with you this way as opposed to gluing them together.

3) The answer to the last question would be – big enough so the washer doesn’t fall through the neck.

Hope this helps.

Let us know how your glass bottle crafts turn out for you.

Nick

Kinkajou Bottle Cutter Review

bottle cutting tool

Review of the Kinkajou bottle cutter, finishing kit and the Jabiru bottle top stems.

Nick has been trying different ways to cut recycled glass bottles for a while now. I don’t even remember how many empty bottles of wine we broke trying the string, nail polish remover and a bucket of icy water method. The gal in the video made it look so easy! We used up about half a bottle of the stuff, plus we also used other flammables like lighter fluid and different types of string, before we finally gave up on it.

A few month later and Nick was at it again, he was determined to figure out how to get a clean cut bottle. This time he purchased the G2 bottle cutter. You read about it here: Bottle Cutting Demonstration Gone Wrong.

Let me just tell you, he had to replace the main part to even get it to work at all. Enter the Kinkajou bottle cutter! Now Nick was able to try out the newest and undoubtedly greatest bottle cutter of them yet. Thank you to Bottle Cutting Inc. for sending us this demo pack!

bottle cutting tools

I loved the colorful Jabiru bottle top stem set right away, but found the Kinkajou bottle cutter a bit complicated looking and a little intimidating. Well, you have to keep in mind I’m not the bottle crafter here. The nice folks from Bottle Cutting Inc. also sent us the Kinkajou Finishing Kit filled with the sand paper you will need to smooth the edges and believe it or not, 2 sets of fun stickers with clever sayings like “Hey Baby, let’s have a few drinks and I will show you my Kinkajou”. Did you know that Nick LOVES stickers?

Alright, that’s about enough from me. Let’s hear from Nick our bottle crafting expert.

Nick, what is your take on the Kinkajou Bottle Cutter?

I was really jazzed when this arrived. The whole idea of cutting bottles has seemed like the natural progression to go with all the bottle craft work that we’ve done over the years.

Trial and error. As with anything else in life, practice makes perfect. My first cut wasn’t perfect, but I could tell right away that it was a matter of making corrections on my part to get the Kinkajou bottle cutter  to work perfectly. After watching the ‘perfect score‘ video, I felt more confident in how to handle the device.

The second bottle was a success and with a little sanding it was usable as glass ware.

First Cut Bottle With The Kinkajou

The first time is always the hardest!

bottle cutting success with the Kinkajou

We also received a set of Jabiru Bottle Top Stems The Friday Night Fun Edition. This is an assortment of different colored holders that can be used for the ‘other half’, i.e. the top of the bottle.

If you wanted to make a matching set of cut bottle glasses, they also sell complete color packages of black and white bases. The Jabiru bottle top stems are easy to use and really make use of the whole bottle. Nothing will go to waste!

Jabiru Bottle Top Stems

The Kinkajou Bottle Cutter Kit is available in many different colors and includes the following:

  • 1 Kinkajou bottle cutter
  • 2 silicone separation rings (fits all bottle sizes)
  • 1 glass finishing tool
  • 3 pieces of silicon carbide sandpaper (80 grit)

Kinkajou Bottle Cutters

The Kinkajou bottle cutter is available in 14 different colors!

Review Results – I was extremely impressed with the Kinkajou bottle cutter. My main objective was to find some consistency in the cuts, as well as a bottle cutter that actually worked. The nail polish string trick simply didn’t work at all, and if you wanted to make a whole set of glasses that were all similar in size, was almost impossible to do with the other cutter.

The Kinkajou was easy to work with and offered the consistent bottle cuts that I was looking for. The Jabiru bottle sets worked very easily and they add a nice finishing touch. The rubber neck allows a variance in the bottle sizes so these should work with any bottle neck. With a working bottle glass cutter in tow I’m going to try and make a glass set of Corona bottles. Getting all six glasses to be the same height should be relatively easy by making the score lines consistent. I’ll post those at a later time. Watch my How to cut glass rings instructional video.

Special thanks to Bottle Cutting Inc. for sending us the Kinkajou bottle cutter, finishing kit and Jabiru bottle top stems.

Buy A Kinkajou

Do you have questions or used the Kinkajou bottle cutter before? Leave us a comment below.

Bottle Lights by Heather From Custom Bottle Design

With the Holiday Season upon us we find a lot of people looking for that one special unique gift that transcends anything else found in a department store.

Look no further. Heather Wass has been busy putting together Holiday themed bottles for her Etsy store, Custom Bottle Design. These bottle lights are all hand crafted and will add some Christmas cheer to any room in your house.

CBD_Words

CBD_Johnsons

CBD_Tree

CBD_Matching


I have to admit I am still pretty new to all of this. I made my first lamp as a Christmas decoration project for myself a year ago. My boss at the bar I work at liked it and asked if he could buy it. Then he put it in the bar as a christmas decoration last year and somehow they just took off! I now even have local businesses who have asked to sell them for me in their business. I have made and sold well over 200 in the last year, and now am experimenting with selling online. I have to admit I am clueless to all of this online stuff but I am learning! I haven’t had to advertise much at all, I post pics of them on my facebook page and other than that it has all been word of mouth and people seeing what I have already sold!

Snowflake lighted bottle

BL – Why Bottles?

HeatherThat’s a great question! I have bar tended for years, and at the end of the night after we log all of the liquor bottles that we emptied for the day, we then just threw them all away, and for years I never thought twice about it. Then I was throwing away the bottles one night and thought… This could turn in to something cool somehow, I’m sure of it! So I took a few home and they sat on a shelf for quite a long time. Then last year while decorating for Christmas I thought, I should make a Christmas decoration with one! (white Bombay Sapphire bottle with snowflakes and blue lights picture) Since My boss told me I could take the bottles home with me I decided to take it in and show him what I did with it and he bought it right then and there! He then used it as a Christmas decoration in our bar, and the orders/requests started flowing in almost immediately! The more I did, the more ideas I came up with, and the better I got. The next thing I knew, a local sports bar started buying sports themed ones in bulk and selling them in his bar! I’m not a drinker myself, but I live in a small town so several local bars and recreational drinkers started saving me their bottles, and now I have a very steady side job on my hands! I mostly use bottles because that is what got me started and has pretty much become my signature, but I have also ventured out and used other things like jars and vases etc…

BL – Is it hard to find time to work on your projects?

HeatherYES! I have always been one who has to stay busy. So for many years I have always had 2-3 jobs at once. Because I have been fortunate enough to pretty much stay over loaded with orders, I spend just about every spare minute I have making them! I’ve made well over 200 in the last year! However, I am happy to say that just as of last Saturday I am now down to just one job! Well, one job (Costco) plus my bottle orders. It has been completely overwhelming trying to keep up with it all and be with my family too. So now I am able to work from home and be close to my family and still keep busy doing what I love!

CBD_Bubbas

BL – Do you get any special requests?

Heather – Yes I do. about 95% of the bottles I’ve made are requests. I let people tell me what they want… designs, colors etc. and I create their vision. On the rare occasion I have the extra time to just make something on my own, it usually sells as soon as I post it to facebook! I get sports themed orders the most, but the personalized ones are my favorite. Every one is made for each individual order, I also make my own stencils for each individual bottle, therefor every one is one of a kind!

BL – Any words of advice for people just starting out?

Heather – Don’t be afraid to be creative! I have never been “taught” anything. Everything I do I’ve learned by trial and error on my own. Sometimes I think some things would be much easier for me if I had some instruction along the way, but I also think that is what sets everyone’s art apart. I started with wood. I’ve made shelves, bookcases, wall hangings etc for my own home and believe me that wasn’t pretty in the begining! I bought wood and nails, and started pounding them together until I got it right! lol But now I have some really great pieces in my home that others have seen and paid me to make for them as well! I am now doing the same with my bottle lamps. Each piece I send out is a piece of me that then enters someone elses life, and to me that is pretty darn cool! I now have my work in 8 different states, and well as 4 in Pittsburgh… one on each of the Steelers coaches desks!

If you would like to contact her with questions or to see more of her bottles you can reach her at:

Etsy: Custom Bottle Design

Facebook: Custom Bottle Design by Heather

e-mail: featherw75@yahoo.com

We would like to thank Heather for taking the time to do this interview. The Holiday season can be pretty hectic and we appreciate her thoughtful responses. Be sure to leave a comment below about her crafting passion.

Bottle-Lamp Holiday Fun Giveaway!

We would like to help kick off this Holiday season with a Giveaway of a copy of our new book and a set of Bosch glass drill bits!

What better way to settle into the winter season than with a new hobby?

We are giving away the following item (total retail value is $33.75):

  • A copy of our book, Recycled Bottle Lamps: Instructions, Project Ideas and Inspirations
  • A four piece Glass and Tile Bit Set

All you have to do is hop on one foot for 30 consecutive minutes, just kidding :)

Please share our Giveaway with your friends and leave us a comment below with your current email address.

Recycled Bottle Lamps: Instructions, Project Ideas and Inspirations

Our Bottle Craft Book is a thorough introduction to Recycled Bottle Crafting. Complete with practical information and full color photograph. This guide will introduce you to the craft, class and beauty of lighted bottles. With easy to follow instructions, over a dozen decorating ideas and bottle craft inspirations, you will be able to make your own bottle lamps and recycled bottle crafts in no time.

Each step is described in detail accompanied with an assortment of illustrated photographs to help guide you through the process. A complete glossary of terms will assist you to easily identify the different lamp parts.

The Bosh Drill Bit Set is for Glass and Tile applications. Nobody but Bosch is offering the innovation found in their product design. This 4-Piece set of drill bits features an unique product geometry with a precision tip, high quality carbide and reinforced head that results in best-in-class speed and life when cutting in glass and tile. The sizes include 1/8″, 3/16″, 1/4″, and 5/16″.

We’ll will announce the lucky winner on Black Friday, Nov. 29th.

Best of Luck to all,

Nick and Silke

Congratulations to Ann Taylor!

This Giveaway is now closed and the lucky winner has been contacted via email.

Thank you everyone for participating and all of your wonderful comments.